

About this integration
Similar to the standard Embed integration, there is minimal configuration to get set up to process Apple Pay on the web. There is no need to sign up for an Apple Developer account with this integration.- Upload the Domain Association File to your website.
- Enable Apple Pay in your merchant dashboard.
- Load the Apple Pay JS SDK.
- Render an Apple Pay button.
- Handle the click of the button.
- Verify the Apple Pay session.
- Catch the Apple Pay token and pass it to the API for processing.
Enable Apple Pay
To enable Apple Pay, head over to your dashboard and then go to Connections -> Catalog -> Apple Pay. Next, complete, and submit the form to create a new Apple Pay service.Registering a domain
To process Apple Pay via the web, register all the domains where the buyer can checkout. To do this, navigate to the Apple Pay service via the dashboard, Connections -> Apple Pay -> Domains -> Add domain name.Integrate Apple Pay
Load the Apple Pay JS SDK
Since iOS 18, users can shop with Apple Pay on devices other than Macs and non-Safari browsers. On submit, a popup displays asking users to scan a code with their iOS 18+ device and complete the payment there.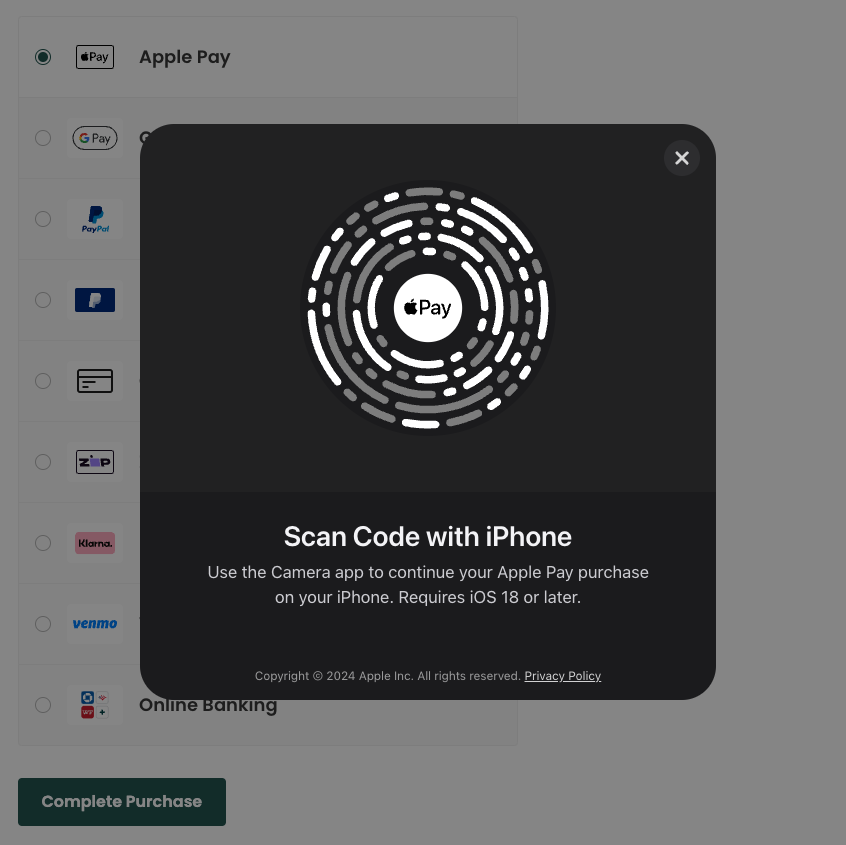
Content Security Policy
Make sure to allow the Apple Pay JS SDK domain in your CSP if you’re using one; otherwise, the script does not load and the Apple Pay option does not show in third-party browsers.Render an Apple Pay button
An Apple Pay button can be displayed and customized with Apple specific CSS.Handle button click
When a button is clicked, start an Apple Pay Session.Verify session
Next, this is the bit that’s specific to the API. Make an API call to the Apple Pay session endpoint to verify the Apple Pay session for your domain. This checks if accepting Apple Pay on your domain is allowed.For this to work it’s important to register the domain
your domain for use with Apple Pay in the dashboard.
400 error with the message Invalid request creating Apple Pay session, Apple rejected the session request. Check that you send the validation_url that Apple
provides in the onvalidatemerchant event, and that the domain_name you send is registered for
Apple Pay in the dashboard.
Always complete merchant validation with the session that this endpoint returns. If the payment
session is validated with another merchant identity, for example a payment service’s own Apple Pay
setup, Gr4vy can’t decrypt the token, and creating the transaction fails with the error Apple Pay token could not be decrypted.
Create a transaction
Finally, once the Apple Pay transaction has been authorized by Apple, create a transaction with the API.This API call could be made in your frontend code, or the token could be sent to your backend for processing.
Apple Pay inside an iframe
Apple Pay works when your checkout page sits inside an iframe, but it needs extra configuration. Each merchant session is tied to a domain, and that domain has to be the top level page, the one shown in the browser’s address bar, rather than the frame the payment is requested from. Skip this section if your checkout page is the top level page.Allow payments in the iframe
Addallow="payment" to the iframe that contains your checkout page.
Register the top level domain
Register the domain of the top level page for Apple Pay, and upload the domain association file to it, as you would for any other checkout domain.Send the top level domain
The domain sent when the merchant session is created has to be that same top level domain. This is the step most often missed, and registering the domain without sending it fails in exactly the same way as sending it without registering. When using Embed, set thetopLevelDomain option.
domain_name rather than deriving it from
document.location, which resolves to the frame’s own domain.
Every domain in the chain must be served over HTTPS with a valid certificate.
Common issues
Apple Pay option is not shown
Apple Pay option is not shown
There could be many reasons why this doesn’t show.
- Make sure you are using an Apple Pay compatible browser and device
- Make sure an Apple account is set up on the device and cards are added to it
- Make sure the system is set up to handle Apple Pay
- Check the Apple Pay connection is enabled
- Check the Apple Pay connection is set up to handle transactions on the domain you’re testing on
- Check a card connector is enabled for the selected country/currency
- Check that a Flow rule doesn’t hide Apple Pay
- When you use Embed, check that the browser passes Embed’s own eligibility check. Embed only shows
Apple Pay when
window.ApplePaySessionexists,ApplePaySession.canMakePayments()returnstrue, andApplePaySession.supportsVersion(3)returnstrue. Headless browsers and browser automation tools usually fail this check, even when Apple Pay appears in the payment options returned by the API.
Domain verification fails
Domain verification fails
If a domain isn’t added, check the Domain Association File on your server.
- Serve the file over HTTPS at
/.well-known/apple-developer-merchantid-domain-association, publicly reachable and without a redirect. - Upload the file exactly as downloaded from the dashboard. Don’t edit it, re-encode it, or add a trailing newline.
- Download the current file from the dashboard for each domain rather than reusing an old copy.
Apple Pay payment failed
Apple Pay payment failed
There could be a few reasons why this doesn’t show but most likely
this means the card was sent to a connector that either doesn’t understand
Apple Pay cards, or did not recognize the test card.
Error when adding test card to wallet
Error when adding test card to wallet
This seems to happen at times with the test cards provided by Apple. Try a
different card, or try again later.
Apple Pay sheet opens and immediately closes
Apple Pay sheet opens and immediately closes
When using a real card in a sandbox environment, Apple Pay fails to initialize. This results
in the Apple Pay UI quickly appearing and then disappearing.The reason for this happening is that the validation URL generated by Apple Pay is rejected by
the
POST /digital-wallets/apple/session endpoint. Please only use test cards in the sandbox environment.'Payment Not Completed' error message
'Payment Not Completed' error message
If the Apple Pay dialog shows but closes automatically with a “Payment Not Completed”
message, check whether your checkout page is inside an iframe. The merchant session is
tied to a domain, and that domain has to be the top level page, so a nested checkout page
needs the top level domain registered and sent when the session is created.See Apple Pay inside an iframe for the configuration this
requires.