> ## Documentation Index
> Fetch the complete documentation index at: https://docs.gr4vy.com/llms.txt
> Use this file to discover all available pages before exploring further.
# Salesforce Commerce Cloud Installation
## Before you start
It's recommended that you first install the Salesforce Commerce Cloud cartridge to a sandbox
instance that is an exact copy of the live store. After verifying everything is
working properly in the sandbox environment, safely install the cartridge in the
live environment.
### Salesforce AppExchange
The [Salesforce Commerce Cloud cartridge](https://appexchange.salesforce.com/appxListingDetail?listingId=d2d4ce39-ea78-46c5-a260-1ce874f4a310) is available for free
in the Salesforce AppExchange.
### Install the cartridges
Upload the following cartridges to the Business Manager of the Salesforce Commerce Cloud instance.
* `int_gr4vy_sfra`
* `int_gr4vy`
* `bm_gr4vy`
Configure the cartridge path as shown in the below tables. Cartridges should be added to the
beginning of the cartridge path. The `int_gr4vy_test` cartridge can be added for testing the back office,
however, it should be removed after testing the integration.
| | |
| ------------------------------- | -------------------------- |
| Site Cartridge Path | `int_gr4vy_sfra:int_gr4vy` |
| Business Manager Cartridge Path | `bm_gr4vy` |
### Metadata
All BM configurations related to the below components have been configured within
`metadata/site-template` folder.
* System/Custom object definitions
* Payment Methods
* Payment Processors
* Services
* Jobs
Please follow the below steps to import the BM configurations for the above-mentioned components.
1. Locate the folder metadata in the installation package.
2. Review the contents within the `site-template` folder.
3. Change the site ID under path `site-template\sites` to the site ID.
4. Archive the folder to `site-template.zip` and import the file via `Site Import & Export`.
### Services
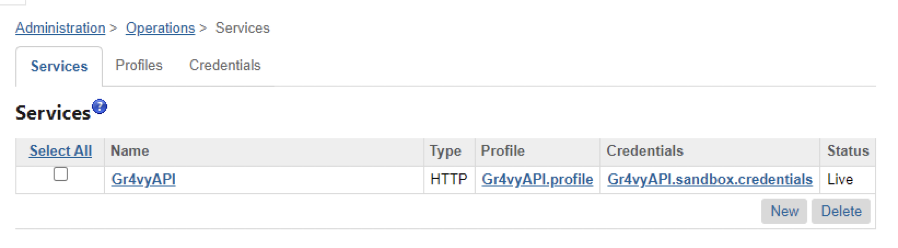
The integration includes a new service named `Gr4vyAPI` which can be accessed from **Administration** -> **Operations** -> **Services**.
 #### Service details
| Service ID | Service Profile | Service Credential |
| ---------- | ------------------ | --------------------------------- |
| `Gr4vyAPI` | `Gr4vyAPI.profile` | `Gr4vyAPI.sandbox.credentials` |
| | | `Gr4vyAPI.production.credentials` |
The URLs for the sandbox and production credentials need to be configured with the URL of your
instance. For example, if the Gr4vy instance ID was `example`, the URL for sandbox credentials
would be `https://api.sandbox.example.gr4vy.app` and the URL for production credentials would be
`https://api.example.gr4vy.app`.
### Payment processor and payment method
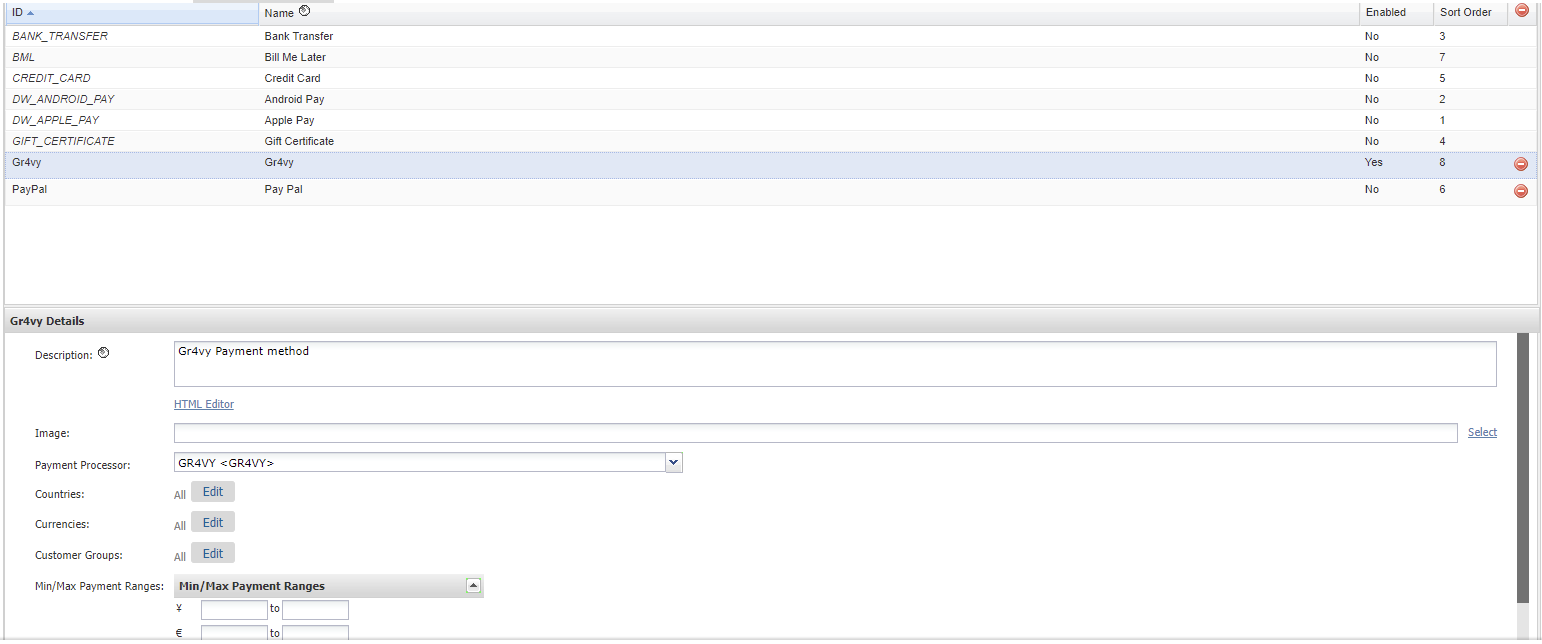
The cartridge includes a Processor called `GR4VY` which should be mapped to the Gr4vy Payment Method
under **Merchant Tools** -> **Ordering** -> **Payment Methods**.
#### Service details
| Service ID | Service Profile | Service Credential |
| ---------- | ------------------ | --------------------------------- |
| `Gr4vyAPI` | `Gr4vyAPI.profile` | `Gr4vyAPI.sandbox.credentials` |
| | | `Gr4vyAPI.production.credentials` |
The URLs for the sandbox and production credentials need to be configured with the URL of your
instance. For example, if the Gr4vy instance ID was `example`, the URL for sandbox credentials
would be `https://api.sandbox.example.gr4vy.app` and the URL for production credentials would be
`https://api.example.gr4vy.app`.
### Payment processor and payment method
The cartridge includes a Processor called `GR4VY` which should be mapped to the Gr4vy Payment Method
under **Merchant Tools** -> **Ordering** -> **Payment Methods**.
 ### Jobs
The integration includes a new job named `ProcessGr4vyNotifications` available under **Administration** -> **Operations** -> **Jobs**.
The `ProcessGr4vyNotifications` job processes webhook notifications received at a scheduled interval.
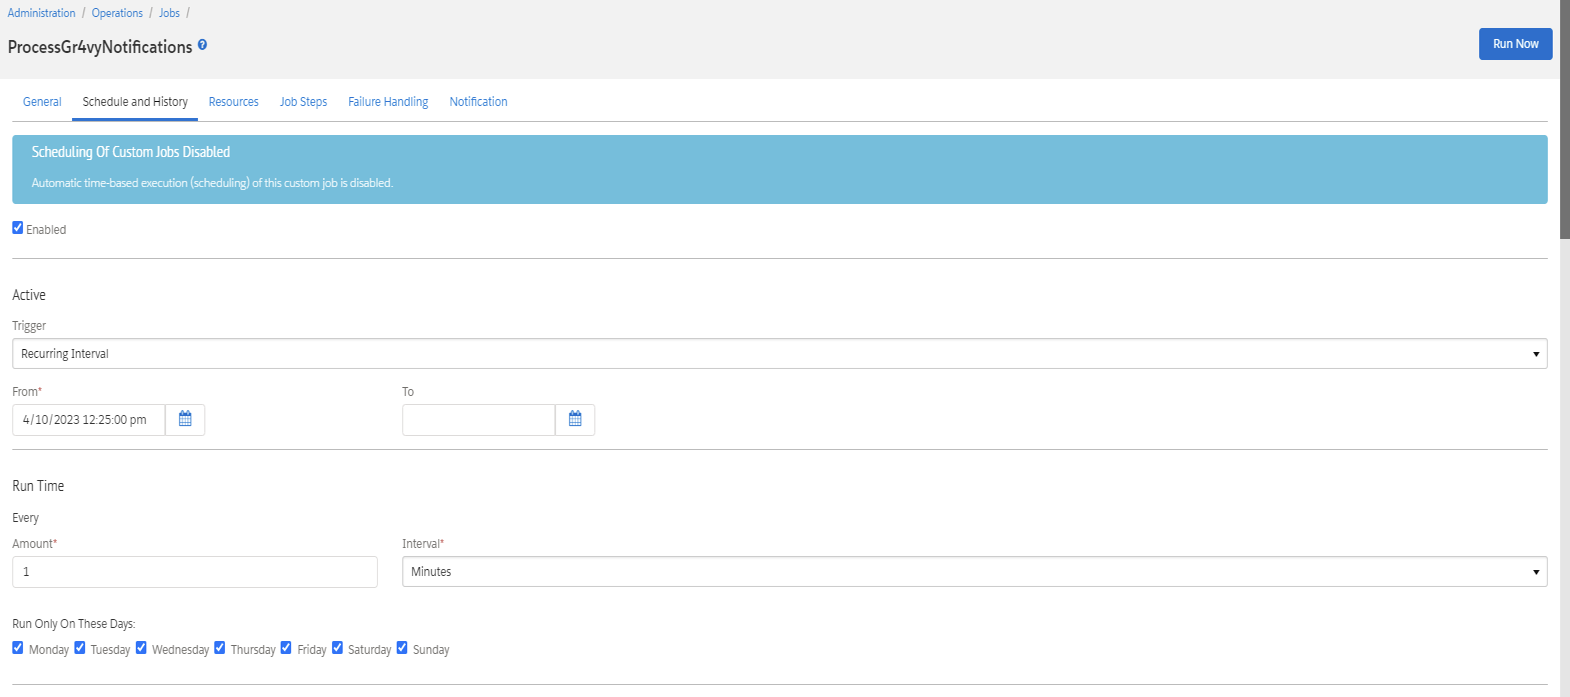
To configure the job, navigate to **Administration** -> **Operations** -> **Jobs** and select `ProcessGr4vyNotifications`. Then on the
**Schedule and History** tab, set the job to run with a recurring interval of 1 minute.
### Jobs
The integration includes a new job named `ProcessGr4vyNotifications` available under **Administration** -> **Operations** -> **Jobs**.
The `ProcessGr4vyNotifications` job processes webhook notifications received at a scheduled interval.
To configure the job, navigate to **Administration** -> **Operations** -> **Jobs** and select `ProcessGr4vyNotifications`. Then on the
**Schedule and History** tab, set the job to run with a recurring interval of 1 minute.
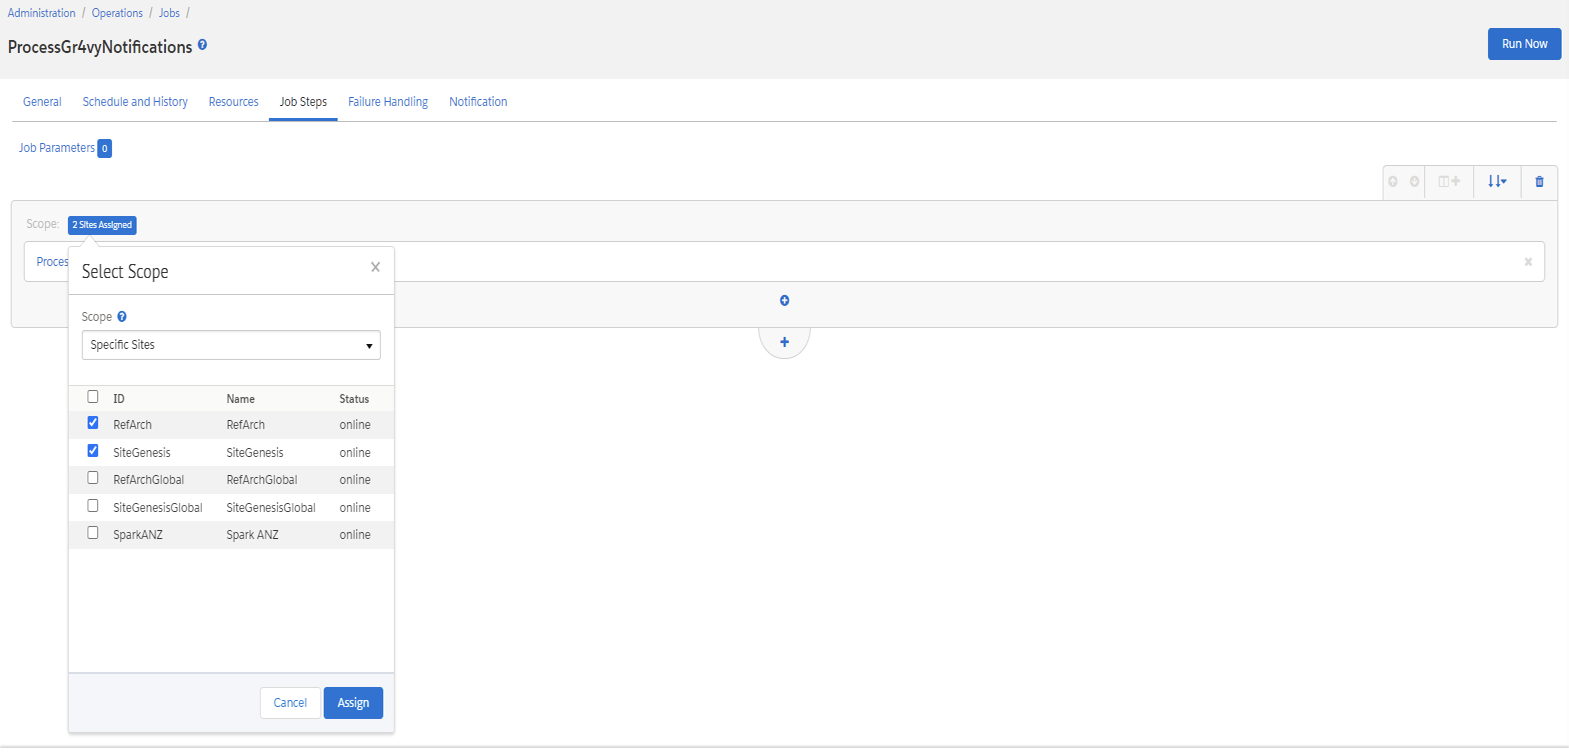
 Then on the `Job Steps` tab, select the `Specific Sites` scope and select the sites where the job is required.