> ## Documentation Index
> Fetch the complete documentation index at: https://docs.gr4vy.com/llms.txt
> Use this file to discover all available pages before exploring further.
# Google Pay on web without Embed
It is possible to use Google Pay on the web without the SDK. To learn how to integrate
Google Pay, following Google's [tutorial][tutorial] is recommended.
The steps below highlight any differences and specifics for the API.
## About this integration
Even without Embed, there is only minimal configuration required to get set up to process Google Pay.
There is no need to sign up for a Google Developer account with this integration.
For Android apps which use this option with `WebViews`, please note that platform specific
Android Google Pay APIs must be invoked.
Please refer to [Google's FAQ](https://developers.google.com/pay/api/web/support/faq) for more
information.
## Enable Google Pay
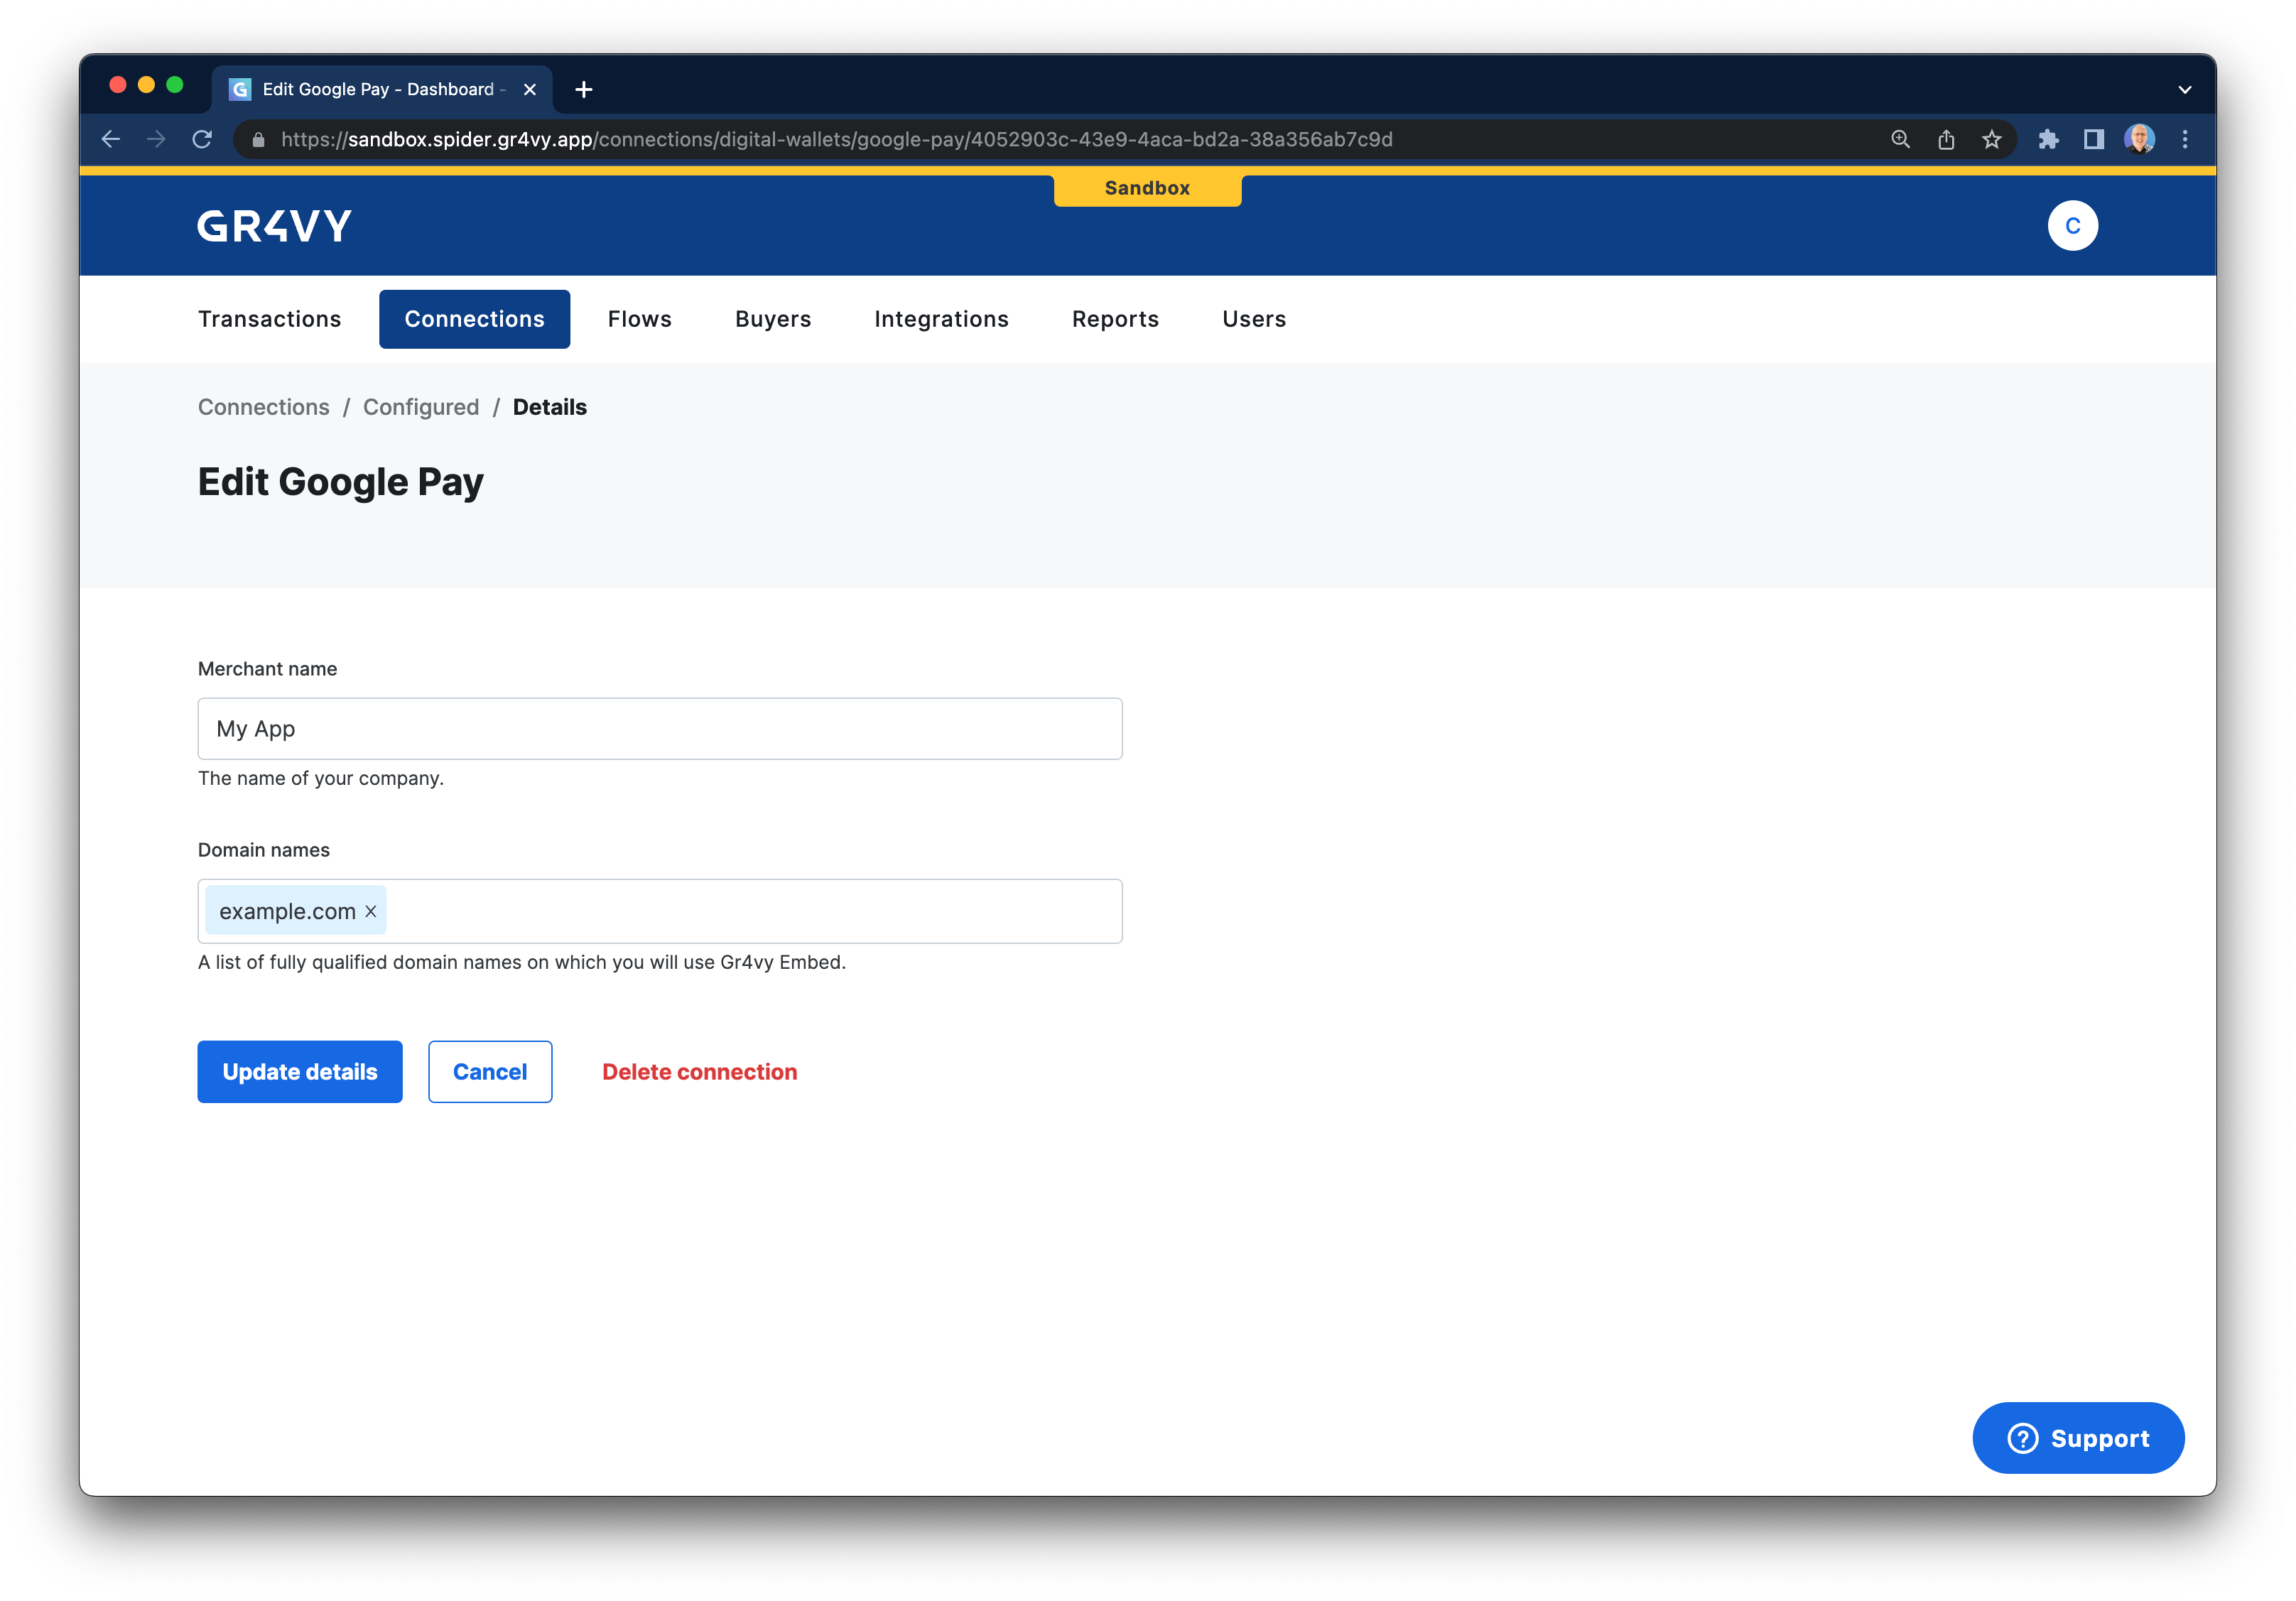
To enable Google Pay, head over to your dashboard and then go to
**Connections** -> **Catalog** -> **Google Pay**.
Next, fill in your merchant name and the one or more domain names where you want to
use Google Pay.
 ## Integrate Google Pay
The following steps highlight the integration points with the system using
Google's [tutorial][tutorial] for Google Pay.
### Fetch a Google Pay session
First, before you can render a Google Pay button, you need to call the API to get a token and your gateway ID.
Call the [`POST /digital-wallets/google/session`](/reference/digital-wallets/get-google-pay-session) API with the domain you want to host Google Pay on. This needs to be the full domain including any subdomains like `www.`.
```json Request theme={"system"}
{ "origin_domain": "www.example.com" }
```
This returns your gateway merchant ID as well as a JWT that authorizes running on your domain.
```json Response theme={"system"}
{
"gateway_merchant_id": "app.gr4vy.sandbox.example.default",
"token": "eyJhbGciOiJFUzI1NiIsInR5cCI....NwRL9ZZg0N--ZyP6I0dDfHHoWhVkrHpQ"
}
```
### Set gateway and merchant ID
Next, in step 2 of [Google's tutorial][tutorial] you are instructed to request a payment token for your provider.
In our case, the value for `gateway` needs to be set to `gr4vy`, and the value of `gatewayMerchantId` needs
to be set to the value you received from our session API in the previous step.
```js theme={"system"}
const tokenizationSpecification = {
type: "PAYMENT_GATEWAY",
parameters: {
gateway: "gr4vy",
gatewayMerchantId: "app.gr4vy.sandbox.example.default",
},
};
```
The instance ID is the unique identifier for the deployment of the system and is included in every API call.
Together with the environment (sandbox or production) it is used to connect to the right APIs, as well as dashboard.
### Set the merchant info
Next, in step 8, you need to set a `merchantInfo` object. This authorizes accepting Google Pay on your domain.
When setting the `merchantInfo` object, make sure to set the `token` returned from the session API, your merchant name, the merchant ID, and the full domain you passed to the session API (including any subdomains like `www.`)
```js theme={"system"}
const merchantInfo = {
authJwt: "eyJhbGciOiJFUzI1NiIsInR5cCI....NwRL9ZZg0N--ZyP6I0dDfHHoWhVkrHpQ",
merchantId: "BCR2DN4T7C3KX6DY", // This identifies our system
merchantName: "Example App",
merchantOrigin: "www.example.com",
};
```
**`OR_BIBED_11`** / **`OR_BIBED_6`** - If you were to encounter any kind of
`OR_BIBED` error you likely did not pass the right domain to our API, or you
did not pass the same domain to our session API and the `merchantInfo` object.
### Create a transaction
In step 10 of Google's tutorial, within the `onPaymentAuthorized` function
you will have a `paymentData` that needs to be sent to the gateway. You can send
this object to our [`POST /transactions`](/reference/transactions/new-transaction#google-pay-payment-method-create) endpoint either directly or via your server.
The payment method used needs to contain the data from the Google Pay payload.
```json Payment method data theme={"system"}
{
"amount": 1299,
"currency": "AUD",
"country": "AU",
"payment_method": {
"method": "googlepay",
"token": "[paymentData.paymentMethodData.tokenizationData.token]",
"card_suffix": "[paymentData.paymentMethodData.info.cardDetails]",
"card_scheme": "[paymentData.paymentMethodData.info.cardNetwork]",
"redirect_url": "https://example.com/callback"
}
}
```
Providing a `redirect_url` is strongly recommended, just in case any
connection is configured to use 3-D Secure. This URL is appended with
both a transaction ID and status (for example
`https://example.com/callback?transaction_id=123
&transaction_status=capture_succeeded`) after 3-D Secure has been completed.
## Test Google Pay
To test Google Pay visit the site that has your integration loaded on it. Please follow the Google Pay documentation with further guides on how
to add [test cards](https://developers.google.com/pay/api/android/guides/resources/test-card-suite) for use in
a sandbox environment.
[tutorial]: https://developers.google.com/pay/api/web/guides/tutorial
## Integrate Google Pay
The following steps highlight the integration points with the system using
Google's [tutorial][tutorial] for Google Pay.
### Fetch a Google Pay session
First, before you can render a Google Pay button, you need to call the API to get a token and your gateway ID.
Call the [`POST /digital-wallets/google/session`](/reference/digital-wallets/get-google-pay-session) API with the domain you want to host Google Pay on. This needs to be the full domain including any subdomains like `www.`.
```json Request theme={"system"}
{ "origin_domain": "www.example.com" }
```
This returns your gateway merchant ID as well as a JWT that authorizes running on your domain.
```json Response theme={"system"}
{
"gateway_merchant_id": "app.gr4vy.sandbox.example.default",
"token": "eyJhbGciOiJFUzI1NiIsInR5cCI....NwRL9ZZg0N--ZyP6I0dDfHHoWhVkrHpQ"
}
```
### Set gateway and merchant ID
Next, in step 2 of [Google's tutorial][tutorial] you are instructed to request a payment token for your provider.
In our case, the value for `gateway` needs to be set to `gr4vy`, and the value of `gatewayMerchantId` needs
to be set to the value you received from our session API in the previous step.
```js theme={"system"}
const tokenizationSpecification = {
type: "PAYMENT_GATEWAY",
parameters: {
gateway: "gr4vy",
gatewayMerchantId: "app.gr4vy.sandbox.example.default",
},
};
```
The instance ID is the unique identifier for the deployment of the system and is included in every API call.
Together with the environment (sandbox or production) it is used to connect to the right APIs, as well as dashboard.
### Set the merchant info
Next, in step 8, you need to set a `merchantInfo` object. This authorizes accepting Google Pay on your domain.
When setting the `merchantInfo` object, make sure to set the `token` returned from the session API, your merchant name, the merchant ID, and the full domain you passed to the session API (including any subdomains like `www.`)
```js theme={"system"}
const merchantInfo = {
authJwt: "eyJhbGciOiJFUzI1NiIsInR5cCI....NwRL9ZZg0N--ZyP6I0dDfHHoWhVkrHpQ",
merchantId: "BCR2DN4T7C3KX6DY", // This identifies our system
merchantName: "Example App",
merchantOrigin: "www.example.com",
};
```
**`OR_BIBED_11`** / **`OR_BIBED_6`** - If you were to encounter any kind of
`OR_BIBED` error you likely did not pass the right domain to our API, or you
did not pass the same domain to our session API and the `merchantInfo` object.
### Create a transaction
In step 10 of Google's tutorial, within the `onPaymentAuthorized` function
you will have a `paymentData` that needs to be sent to the gateway. You can send
this object to our [`POST /transactions`](/reference/transactions/new-transaction#google-pay-payment-method-create) endpoint either directly or via your server.
The payment method used needs to contain the data from the Google Pay payload.
```json Payment method data theme={"system"}
{
"amount": 1299,
"currency": "AUD",
"country": "AU",
"payment_method": {
"method": "googlepay",
"token": "[paymentData.paymentMethodData.tokenizationData.token]",
"card_suffix": "[paymentData.paymentMethodData.info.cardDetails]",
"card_scheme": "[paymentData.paymentMethodData.info.cardNetwork]",
"redirect_url": "https://example.com/callback"
}
}
```
Providing a `redirect_url` is strongly recommended, just in case any
connection is configured to use 3-D Secure. This URL is appended with
both a transaction ID and status (for example
`https://example.com/callback?transaction_id=123
&transaction_status=capture_succeeded`) after 3-D Secure has been completed.
## Test Google Pay
To test Google Pay visit the site that has your integration loaded on it. Please follow the Google Pay documentation with further guides on how
to add [test cards](https://developers.google.com/pay/api/android/guides/resources/test-card-suite) for use in
a sandbox environment.
[tutorial]: https://developers.google.com/pay/api/web/guides/tutorial