> ## Documentation Index
> Fetch the complete documentation index at: https://docs.gr4vy.com/llms.txt
> Use this file to discover all available pages before exploring further.
# CyberSource
> Connect to CyberSource to accept card payments and local payment methods.
Cybersource is a Visa solution that provides global card processing, risk
management, and payment acceptance tools for enterprises and online businesses.
The platform supports comprehensive payment processing with advanced features
for merchants worldwide.
## Supported payment methods
| Method | Countries | Currencies | Notes |
| ---------------------------- | ------------------- | --------------------- | --------------------------------- |
| [Card](./cybersource-card) | `AT`, `AU`, 38 more | `AED`, `AFN`, 95 more | Card processing via Cybersource. |
| [iDEAL](./cybersource-ideal) | `NL` | `EUR` | Bank redirect in the Netherlands. |
| [KCP](./cybersource-kcp) | `KR` | `KRW` | Bank redirect in South Korea. |
## Setup
To sign-up for a Cybersource account, request a
[sandbox account](https://developer.cybersource.com/hello-world/sandbox.html),
this can take 1-2 days.
## Credentials
Cybersource supports two authentication methods. The existing method uses
HTTP Signature with a shared secret key. Cybersource is retiring this in
favour of JWT authentication with Message Level Encryption (MLE), which
encrypts request and response payloads at the app layer to protect
sensitive data.
All Cybersource REST-based merchants must migrate to JWT with MLE by
**September 30, 2026**. To enable MLE in Gr4vy, you must obtain all four new
credentials from Cybersource and configure them on your connection. Until then,
connections configured with HTTP Signature credentials continue to work as
before.
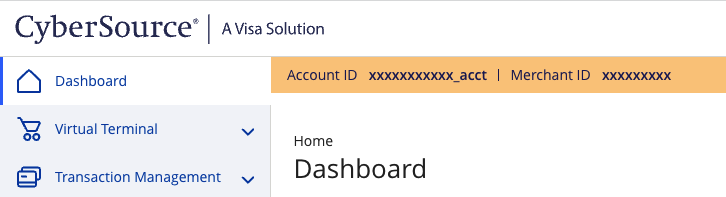
All configurations require your **Merchant ID**, which is the
Cybersource-assigned ID for your account, found in the Cybersource Business
Center.
 The remaining credentials depend on which authentication method you are using.
### HTTP signature (soon to be deprecated)
**Merchant Key ID** and **Merchant Secret Key:** create a REST API Shared
Secret Key. This is also documented on the
[Cybersource Knowledge Base](https://support.cybersource.com/knowledgebase/Knowledgearticle/?code=000002926).
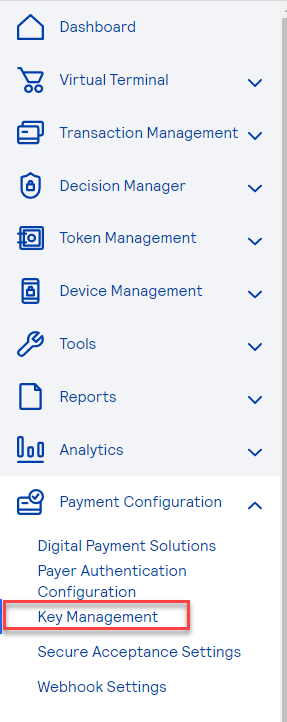
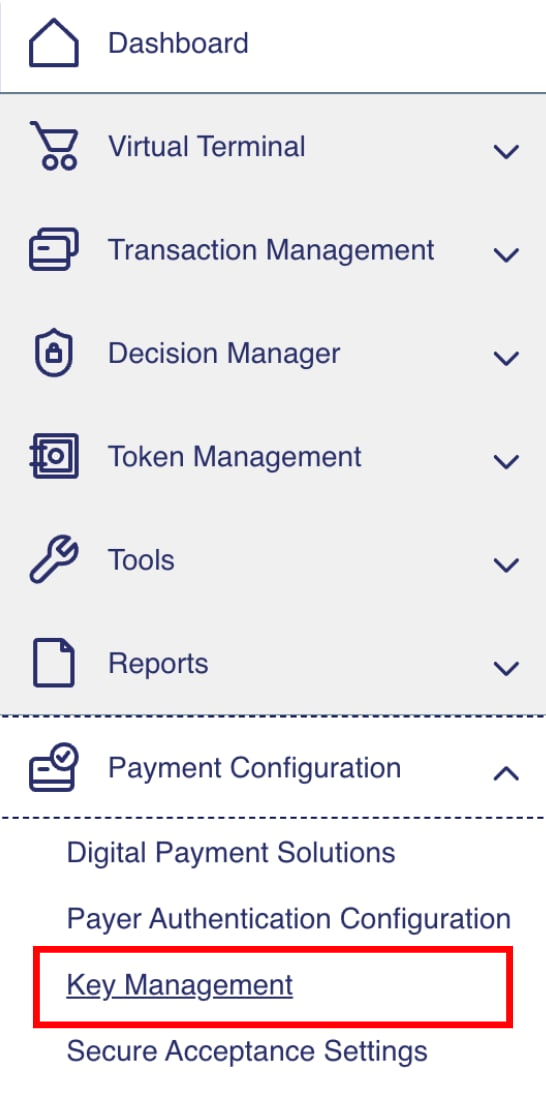
1. Sign in to the Cybersource Business Center (Test or Production) where the key is used
2. Select Payment Configuration > Key Management
The remaining credentials depend on which authentication method you are using.
### HTTP signature (soon to be deprecated)
**Merchant Key ID** and **Merchant Secret Key:** create a REST API Shared
Secret Key. This is also documented on the
[Cybersource Knowledge Base](https://support.cybersource.com/knowledgebase/Knowledgearticle/?code=000002926).
1. Sign in to the Cybersource Business Center (Test or Production) where the key is used
2. Select Payment Configuration > Key Management
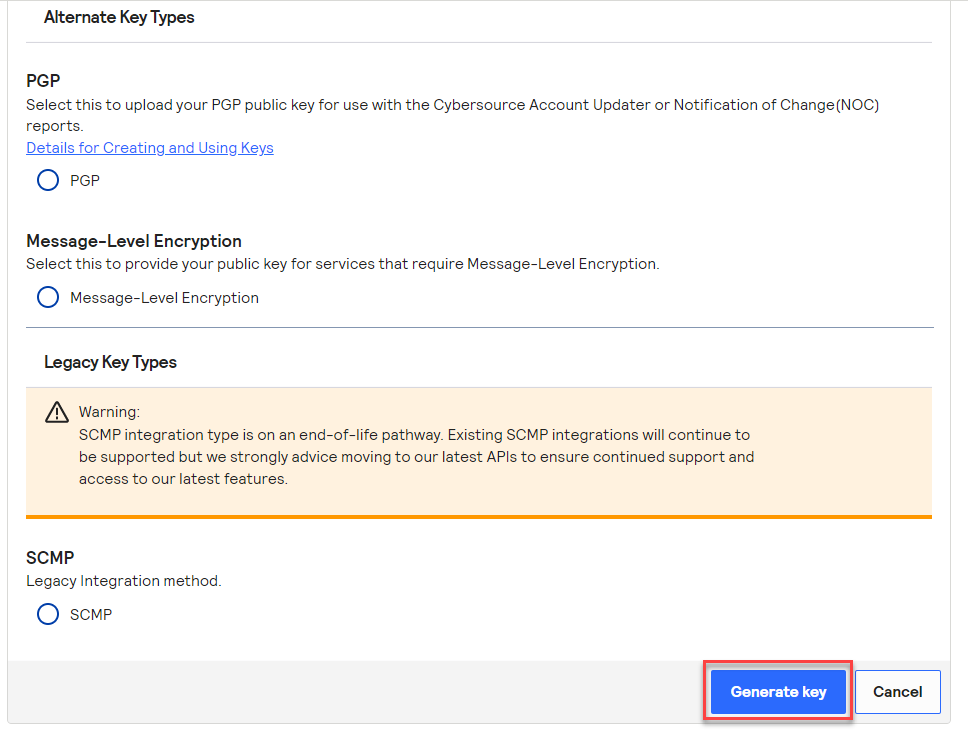
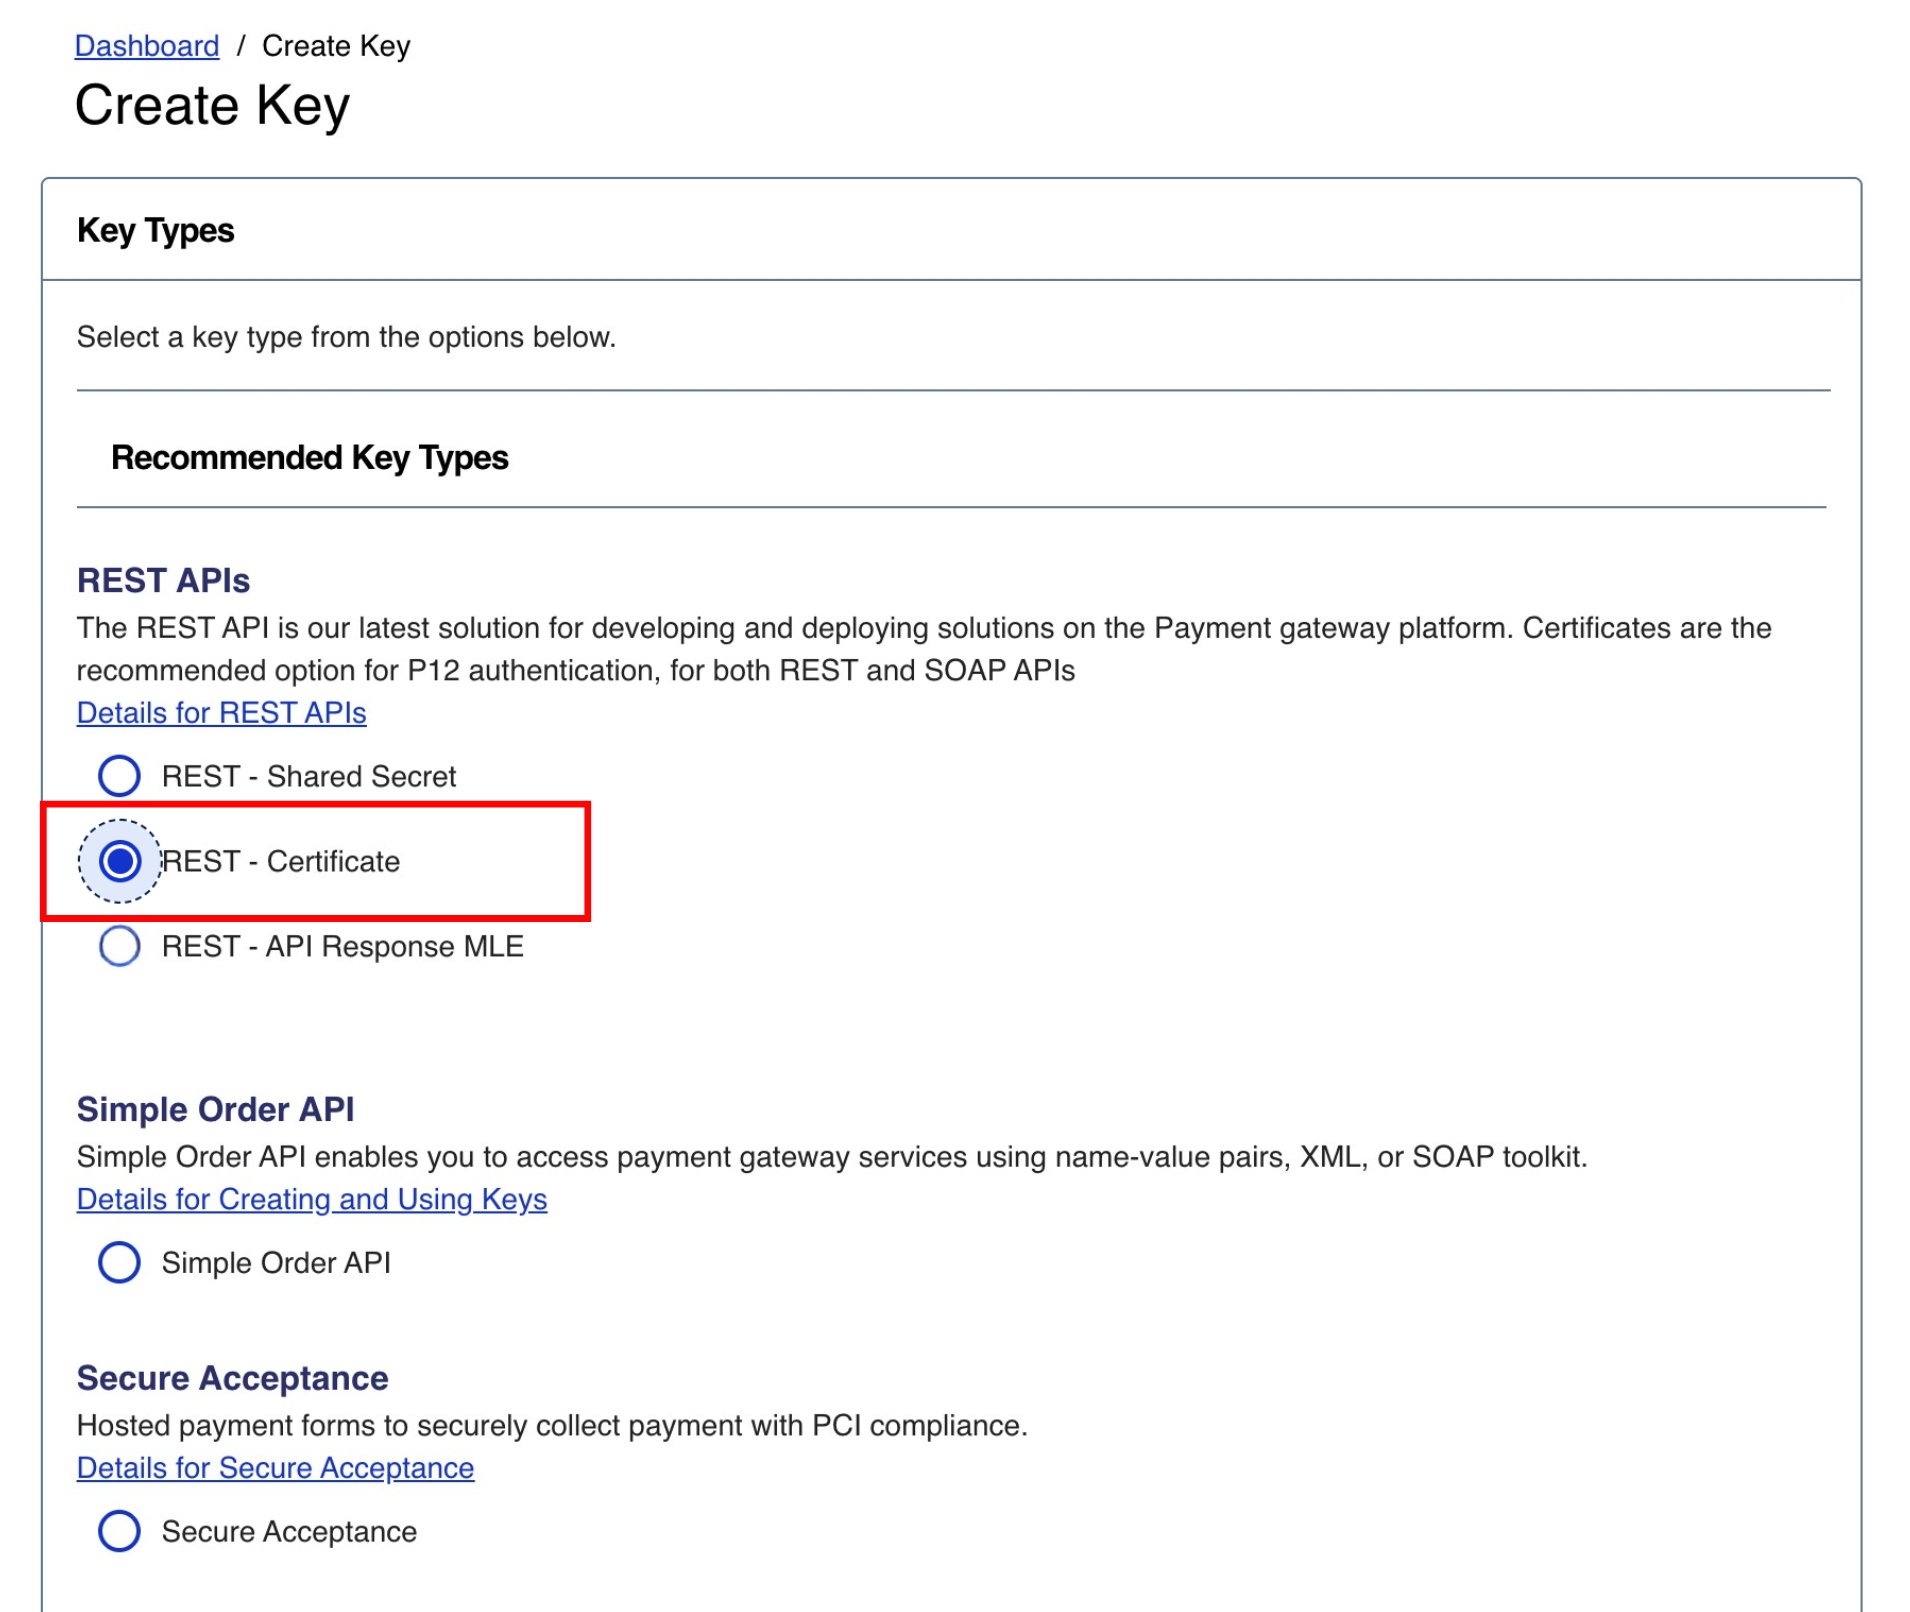
 3. Select Generate Key at the top right
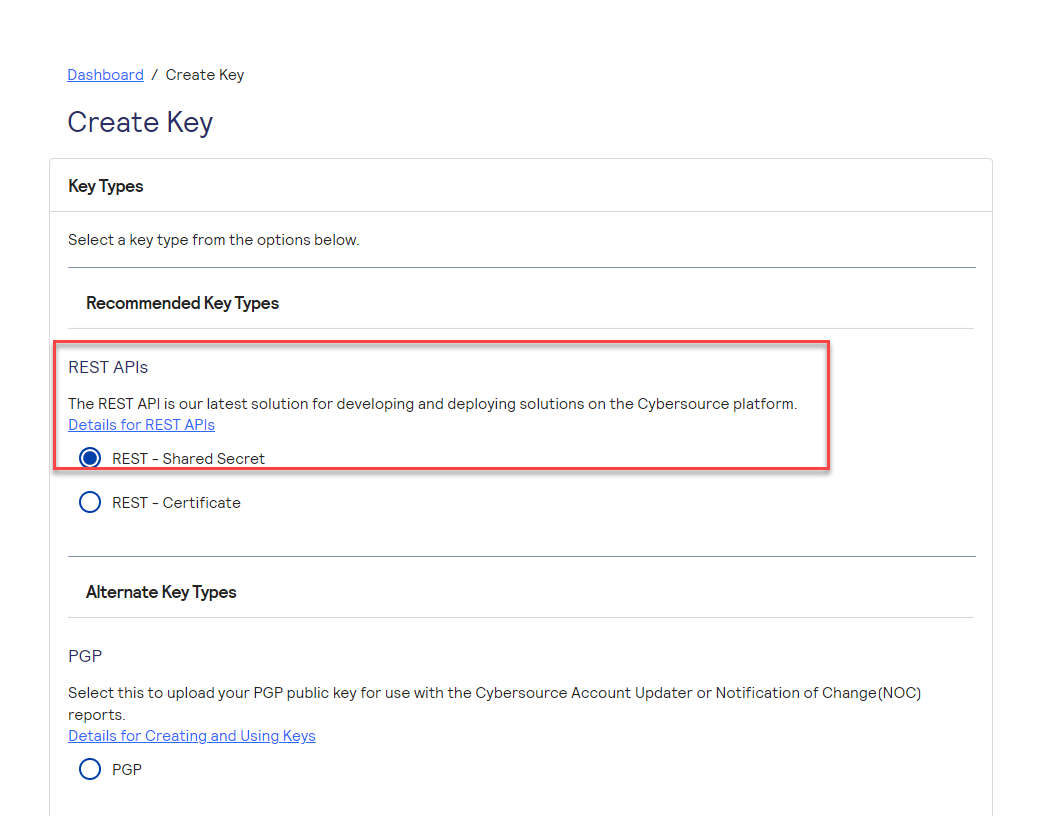
 4. From the list, make sure to check the radio button for REST APIs - REST - Shared Secret Key
 5. Click Generate Key at the bottom
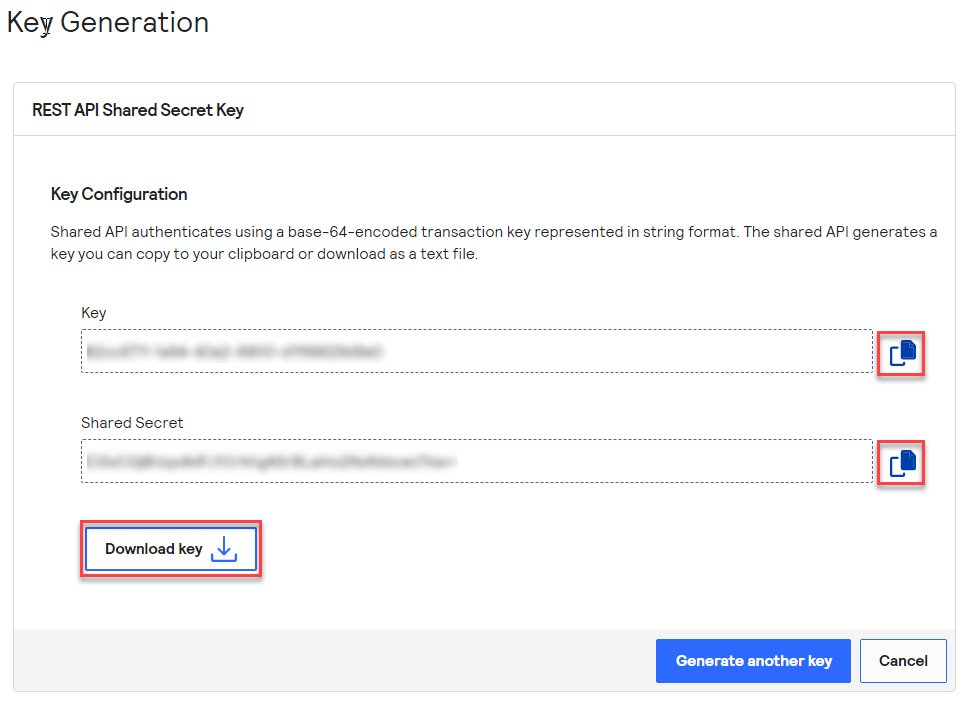
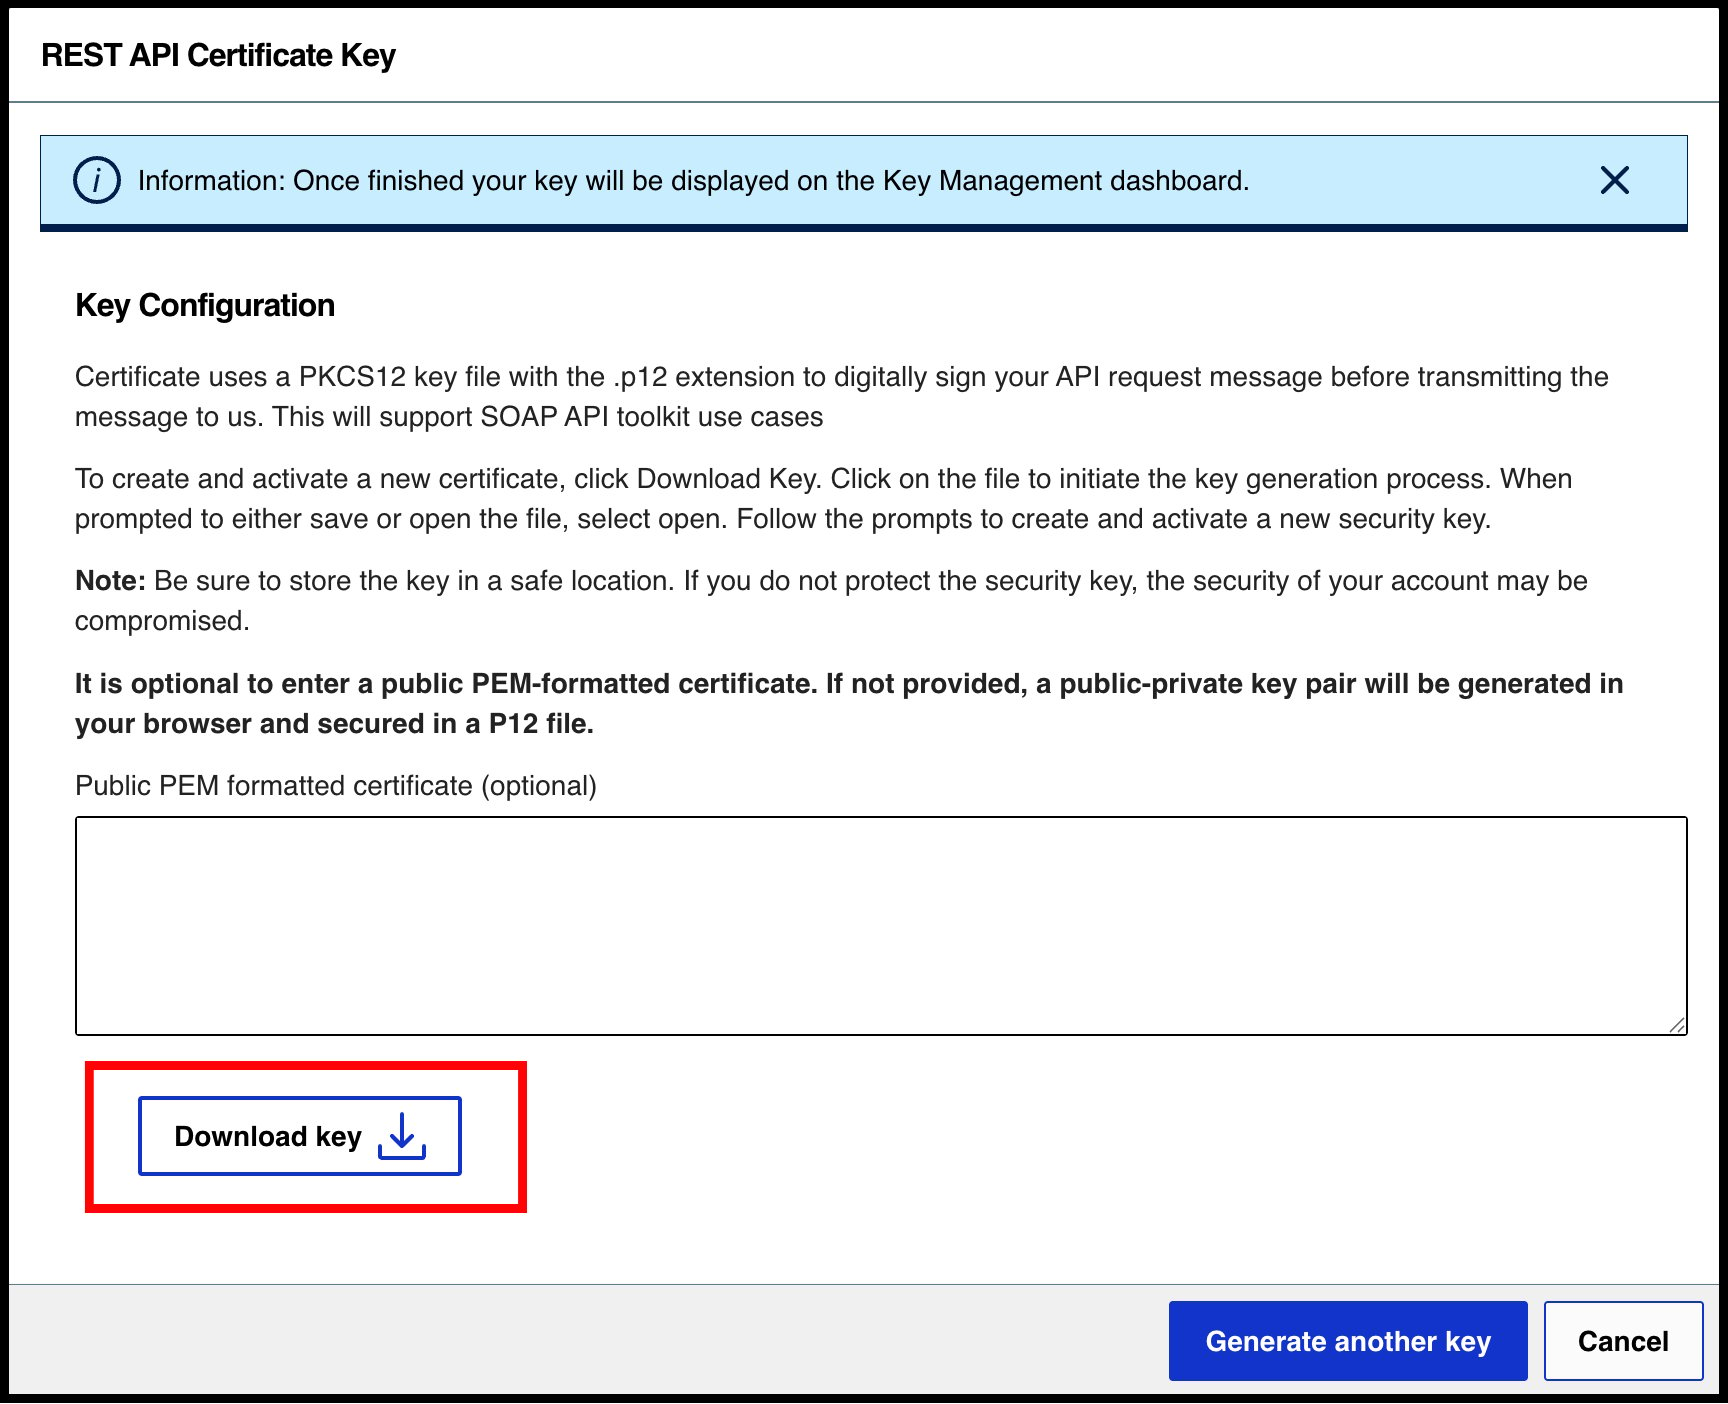
 6. Click on Download Key or copy the keys using the copy function next to Key and Shared Secret
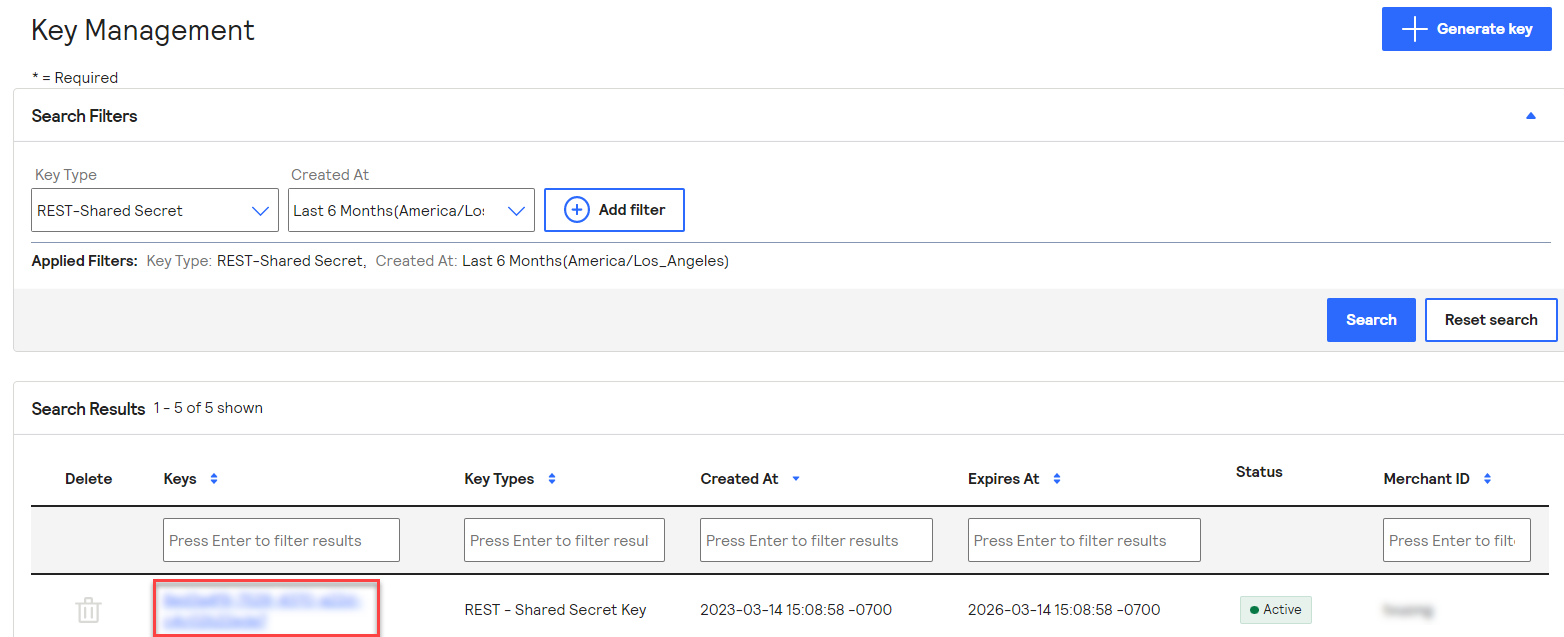
 After creating a Shared Secret Key, obtain the `Key ID`:
1. Go to Payment Configuration > Key Management
2. Find the key from the list
After creating a Shared Secret Key, obtain the `Key ID`:
1. Go to Payment Configuration > Key Management
2. Find the key from the list
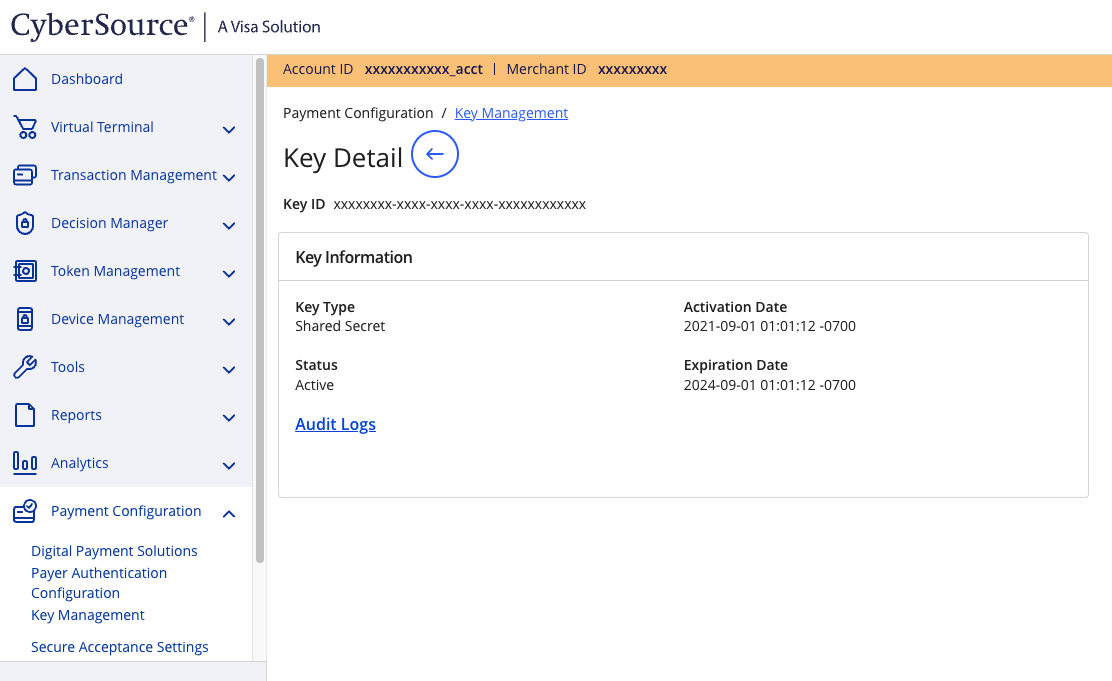
 3. The `Key ID` is listed below the `Key Detail` title
 ### JWT and message level encryption
When all four fields below are configured, Gr4vy automatically uses the
JWT + MLE path.
**P12 Certificate:** the certificate file used to sign JWT authentication
headers and to encrypt the request payload sent to Cybersource. Generated in
Cybersource Business Center under Key Management as a **REST–Certificate**.
To generate a P12 certificate for the
[sandbox](https://businesscentertest.cybersource.com) or
[production](https://businesscenter.cybersource.com) environment:
1. Sign in to Cybersource Business Center
2. On the left navigation panel, go to Payment Configuration > Key Management
### JWT and message level encryption
When all four fields below are configured, Gr4vy automatically uses the
JWT + MLE path.
**P12 Certificate:** the certificate file used to sign JWT authentication
headers and to encrypt the request payload sent to Cybersource. Generated in
Cybersource Business Center under Key Management as a **REST–Certificate**.
To generate a P12 certificate for the
[sandbox](https://businesscentertest.cybersource.com) or
[production](https://businesscenter.cybersource.com) environment:
1. Sign in to Cybersource Business Center
2. On the left navigation panel, go to Payment Configuration > Key Management
 3. Click **+ Generate key**
 4. On the Create Key panel, select **REST–Certificate**, scroll down and click Generate key
 5. Click **Download key**
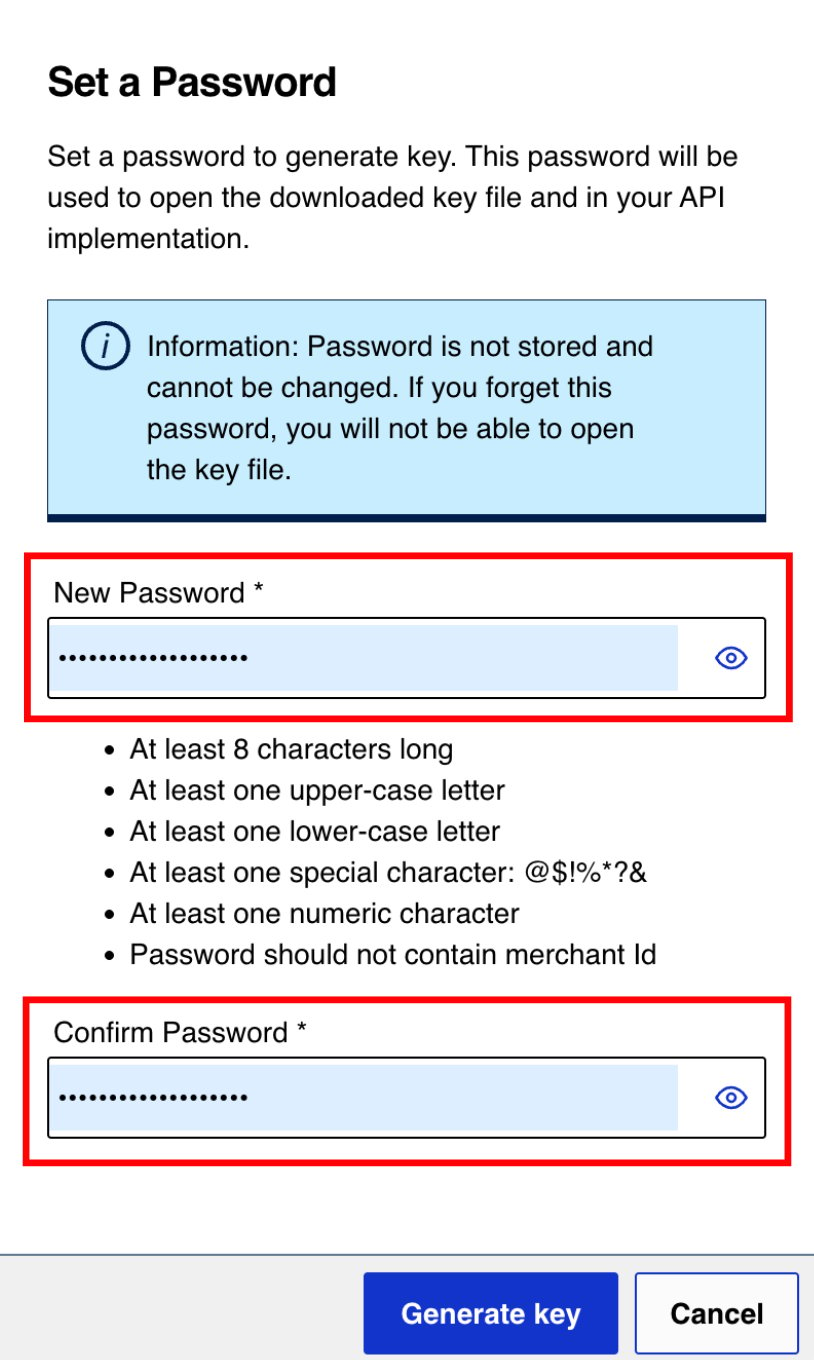
 6. Set a password on the prompt and note it down—this is your P12 certificate password
 7. The `.p12` file downloads automatically—upload it to the Gr4vy dashboard as your P12 certificate
**P12 Certificate Password:** the password set when the P12 certificate was
generated in the preceding steps.
Refer to the [Cybersource documentation](https://developer.cybersource.com/docs/cybs/en-us/platform/developer/all/rest/rest-getting-started/restgs-jwt-message-intro/restgs-security-p12-intro.html)
for further guidance on creating a certificate, uploading an existing one and testing your certificates.
**MLE Response P12:** the P12 file Gr4vy uses to decrypt Cybersource's
encrypted API responses. Cybersource generates the key pair—keeping the
public key to encrypt responses—and you download the P12 containing the
private key.
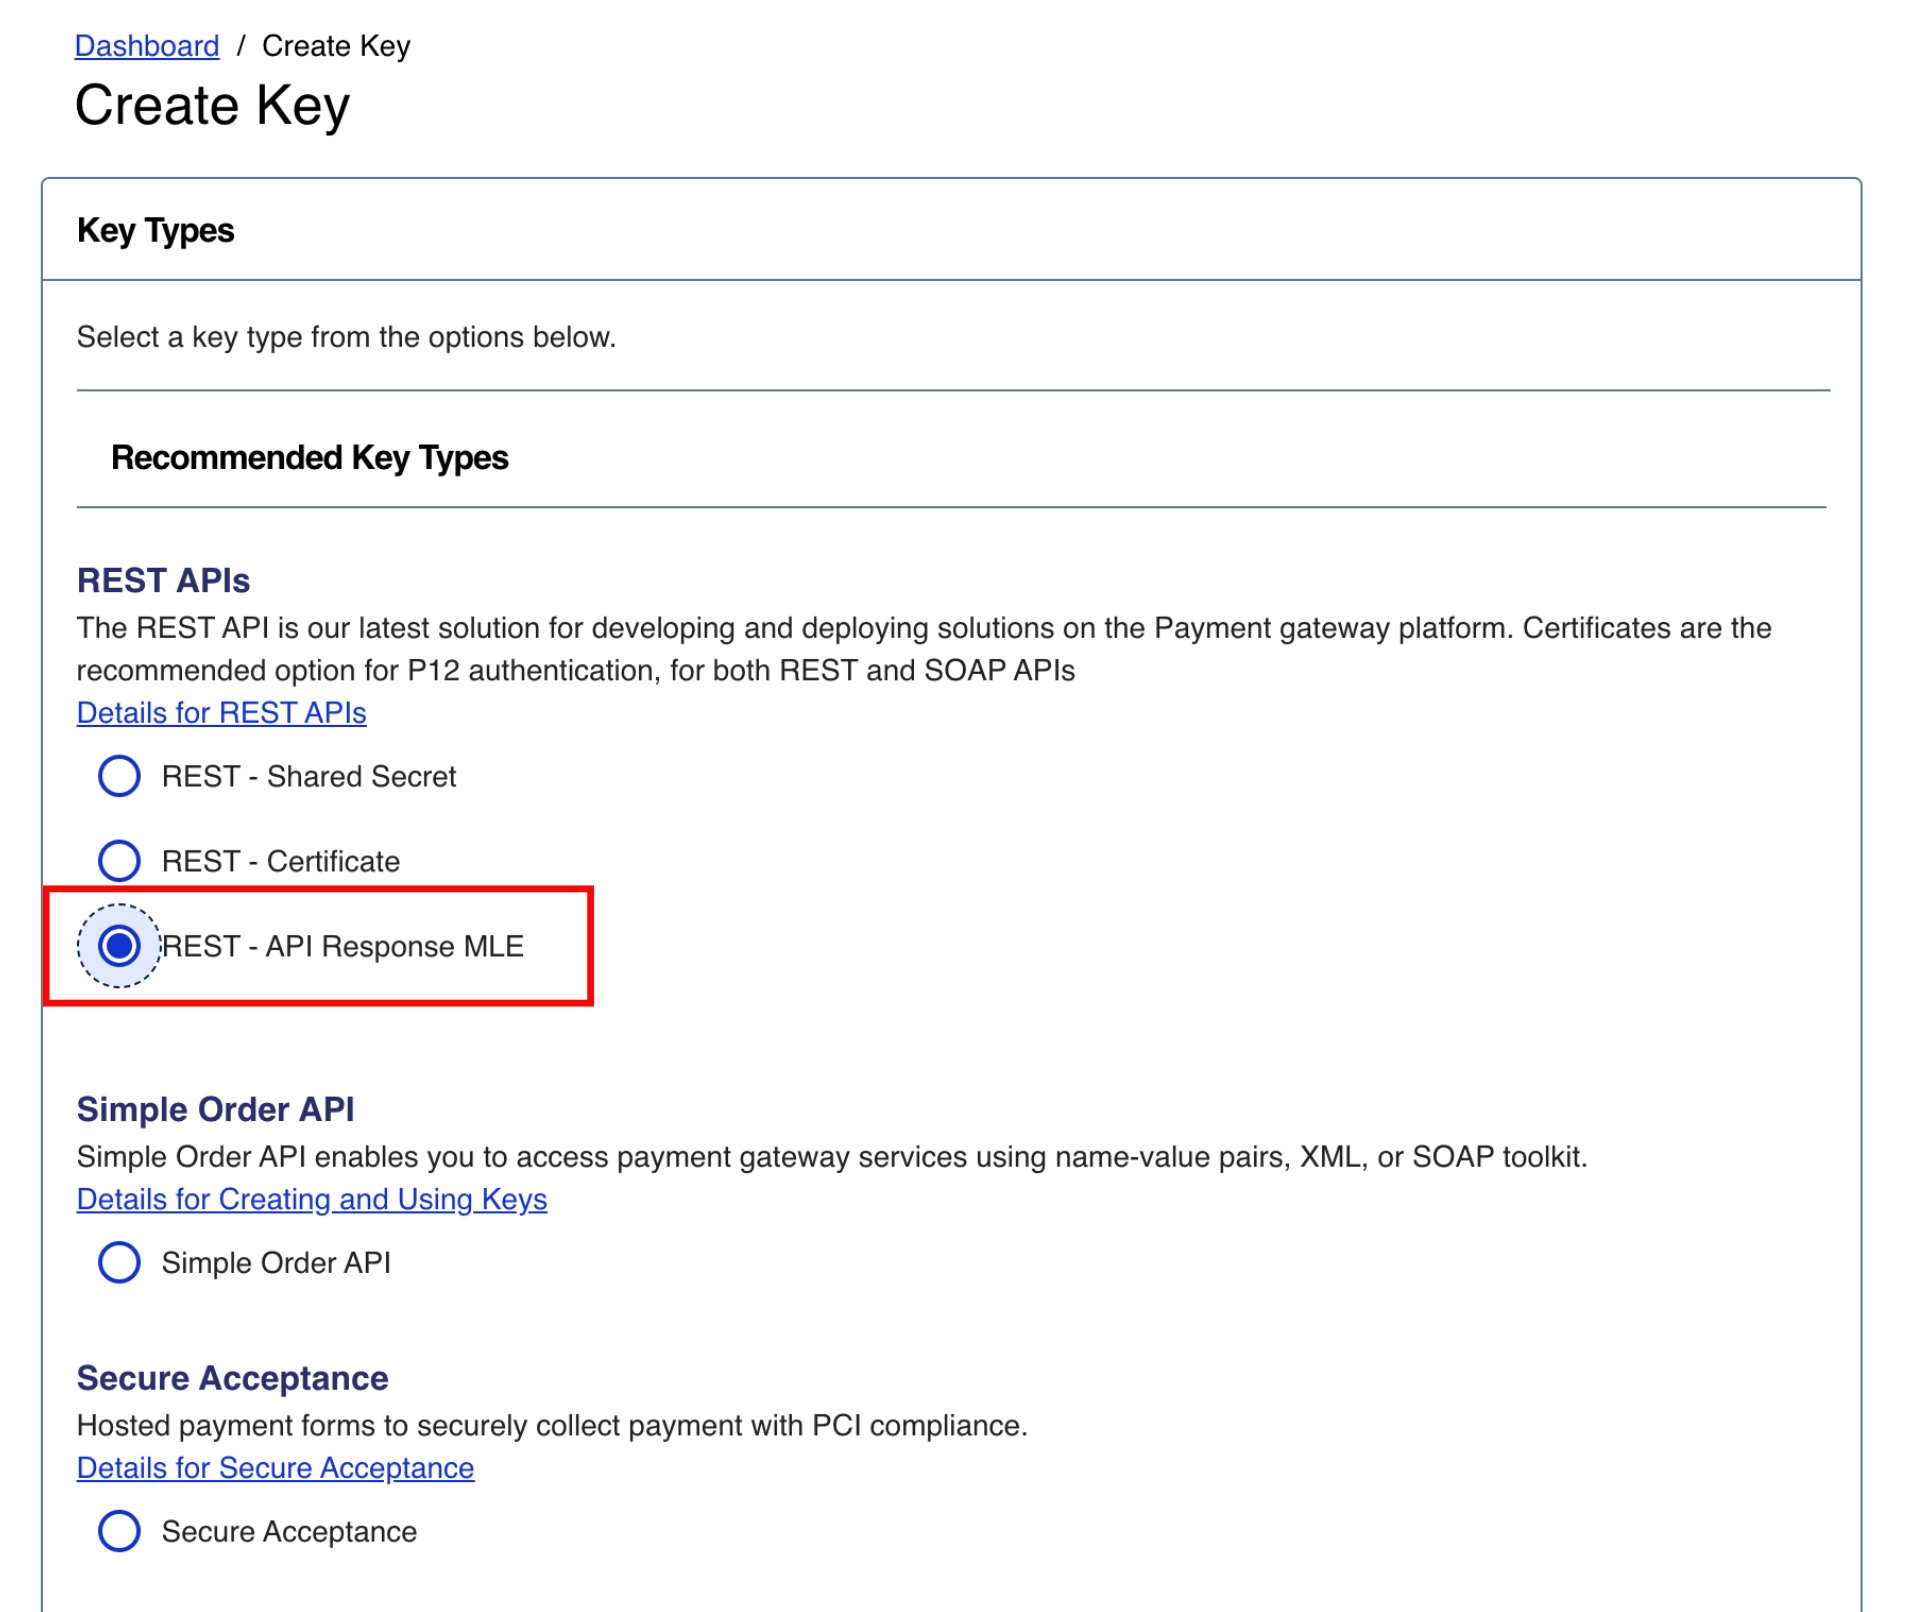
To generate a response MLE key:
1. In Cybersource Business Center, go to Payment Configuration > Key Management
2. Click **+ Generate key** and select **REST–API Response MLE**
7. The `.p12` file downloads automatically—upload it to the Gr4vy dashboard as your P12 certificate
**P12 Certificate Password:** the password set when the P12 certificate was
generated in the preceding steps.
Refer to the [Cybersource documentation](https://developer.cybersource.com/docs/cybs/en-us/platform/developer/all/rest/rest-getting-started/restgs-jwt-message-intro/restgs-security-p12-intro.html)
for further guidance on creating a certificate, uploading an existing one and testing your certificates.
**MLE Response P12:** the P12 file Gr4vy uses to decrypt Cybersource's
encrypted API responses. Cybersource generates the key pair—keeping the
public key to encrypt responses—and you download the P12 containing the
private key.
To generate a response MLE key:
1. In Cybersource Business Center, go to Payment Configuration > Key Management
2. Click **+ Generate key** and select **REST–API Response MLE**
 3. Click **Download key**
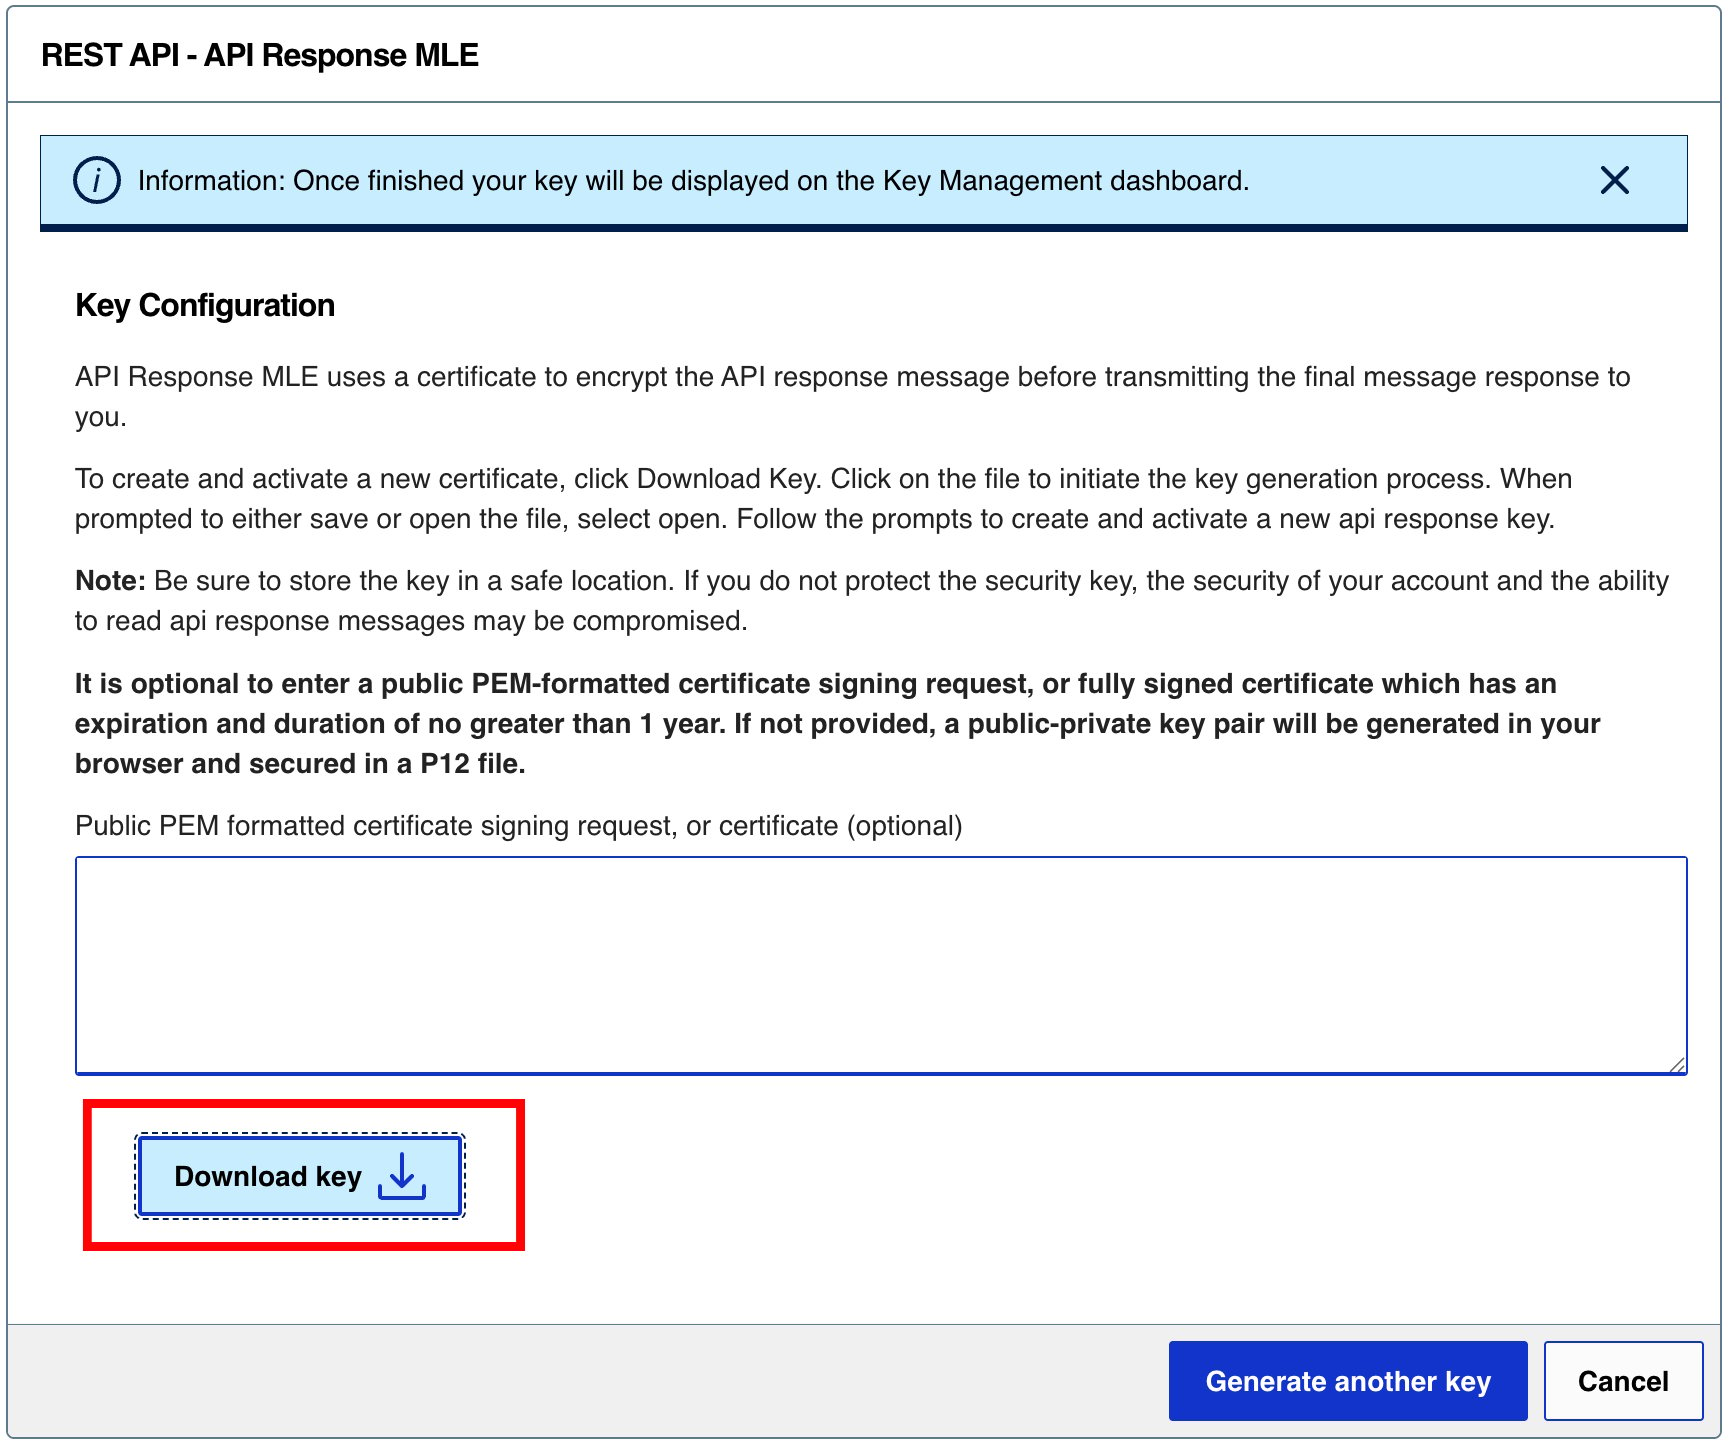 4. Set a password on the prompt and note it down—this is your MLE Response P12 password
5. Upload the downloaded `.p12` file here
Refer to the [Cybersource documentation](https://developer.cybersource.com/docs/cybs/en-us/security-keys/user/all/ada/security-keys/restgs-security-mle-reply.html)
for further guidance.
**MLE Response P12 Password:** the password set when the MLE Response P12
was generated in the preceding steps.
4. Set a password on the prompt and note it down—this is your MLE Response P12 password
5. Upload the downloaded `.p12` file here
Refer to the [Cybersource documentation](https://developer.cybersource.com/docs/cybs/en-us/security-keys/user/all/ada/security-keys/restgs-security-mle-reply.html)
for further guidance.
**MLE Response P12 Password:** the password set when the MLE Response P12
was generated in the preceding steps.