> ## Documentation Index
> Fetch the complete documentation index at: https://docs.gr4vy.com/llms.txt
> Use this file to discover all available pages before exploring further.
# Checkout.com
> Connect to Checkout.com to accept card payments.
Checkout.com is a global payment processor providing payment solutions for merchants worldwide. The platform supports multiple payment methods with comprehensive coverage across regions and currencies.
## Supported payment methods
| Method | Countries | Currencies | Notes |
| -------------------------- | ------------------- | ---------------------- | --------------------------------- |
| [Card](./checkoutcom-card) | `AT`, `AU`, 38 more | `AED`, `AFN`, 130 more | Card processing via Checkout.com. |
## Setup
Checkout.com provides a self-service sign-up for a sandbox account. To sign up
for an account, visit the
[sign-up page](https://www.checkout.com/get-test-account) and fill in the
details.
### Enable full card processing
When a card payment is routed through this connection, Gr4vy sends the full
card number (PAN) to Checkout.com, so your Checkout.com account must be enabled
for full card processing. If this is not enabled, payments fail with a
`Full card payments disabled` error.
Contact your Checkout.com account manager to confirm that full card processing
is enabled for the merchant ID (MID) used by this connection before going live.
## Add to the Gr4vy dashboard
To add Checkout.com as a connection in the Gr4vy dashboard:
1. In the Gr4vy dashboard, navigate to **Connections** -> **Add connection**.
2. Search for and select **Checkout.com**.
3. Enter a display name for this connection, for example `Checkout.com`.
4. Enter the credentials described in the [Credentials](#credentials) section below.
5. Click **Save** to create the connection.
After saving, your Checkout.com connector ID is available under **Connections**
-> **Configured connections**. You need this ID when configuring routing rules in
[Flow](/guides/dashboard/flow/overview) or when passing an explicit
`payment_service_id` in API requests.
## Credentials
When setting up Checkout.com in the dashboard, get the following
credentials from Checkout.com and configure them:
### Public key
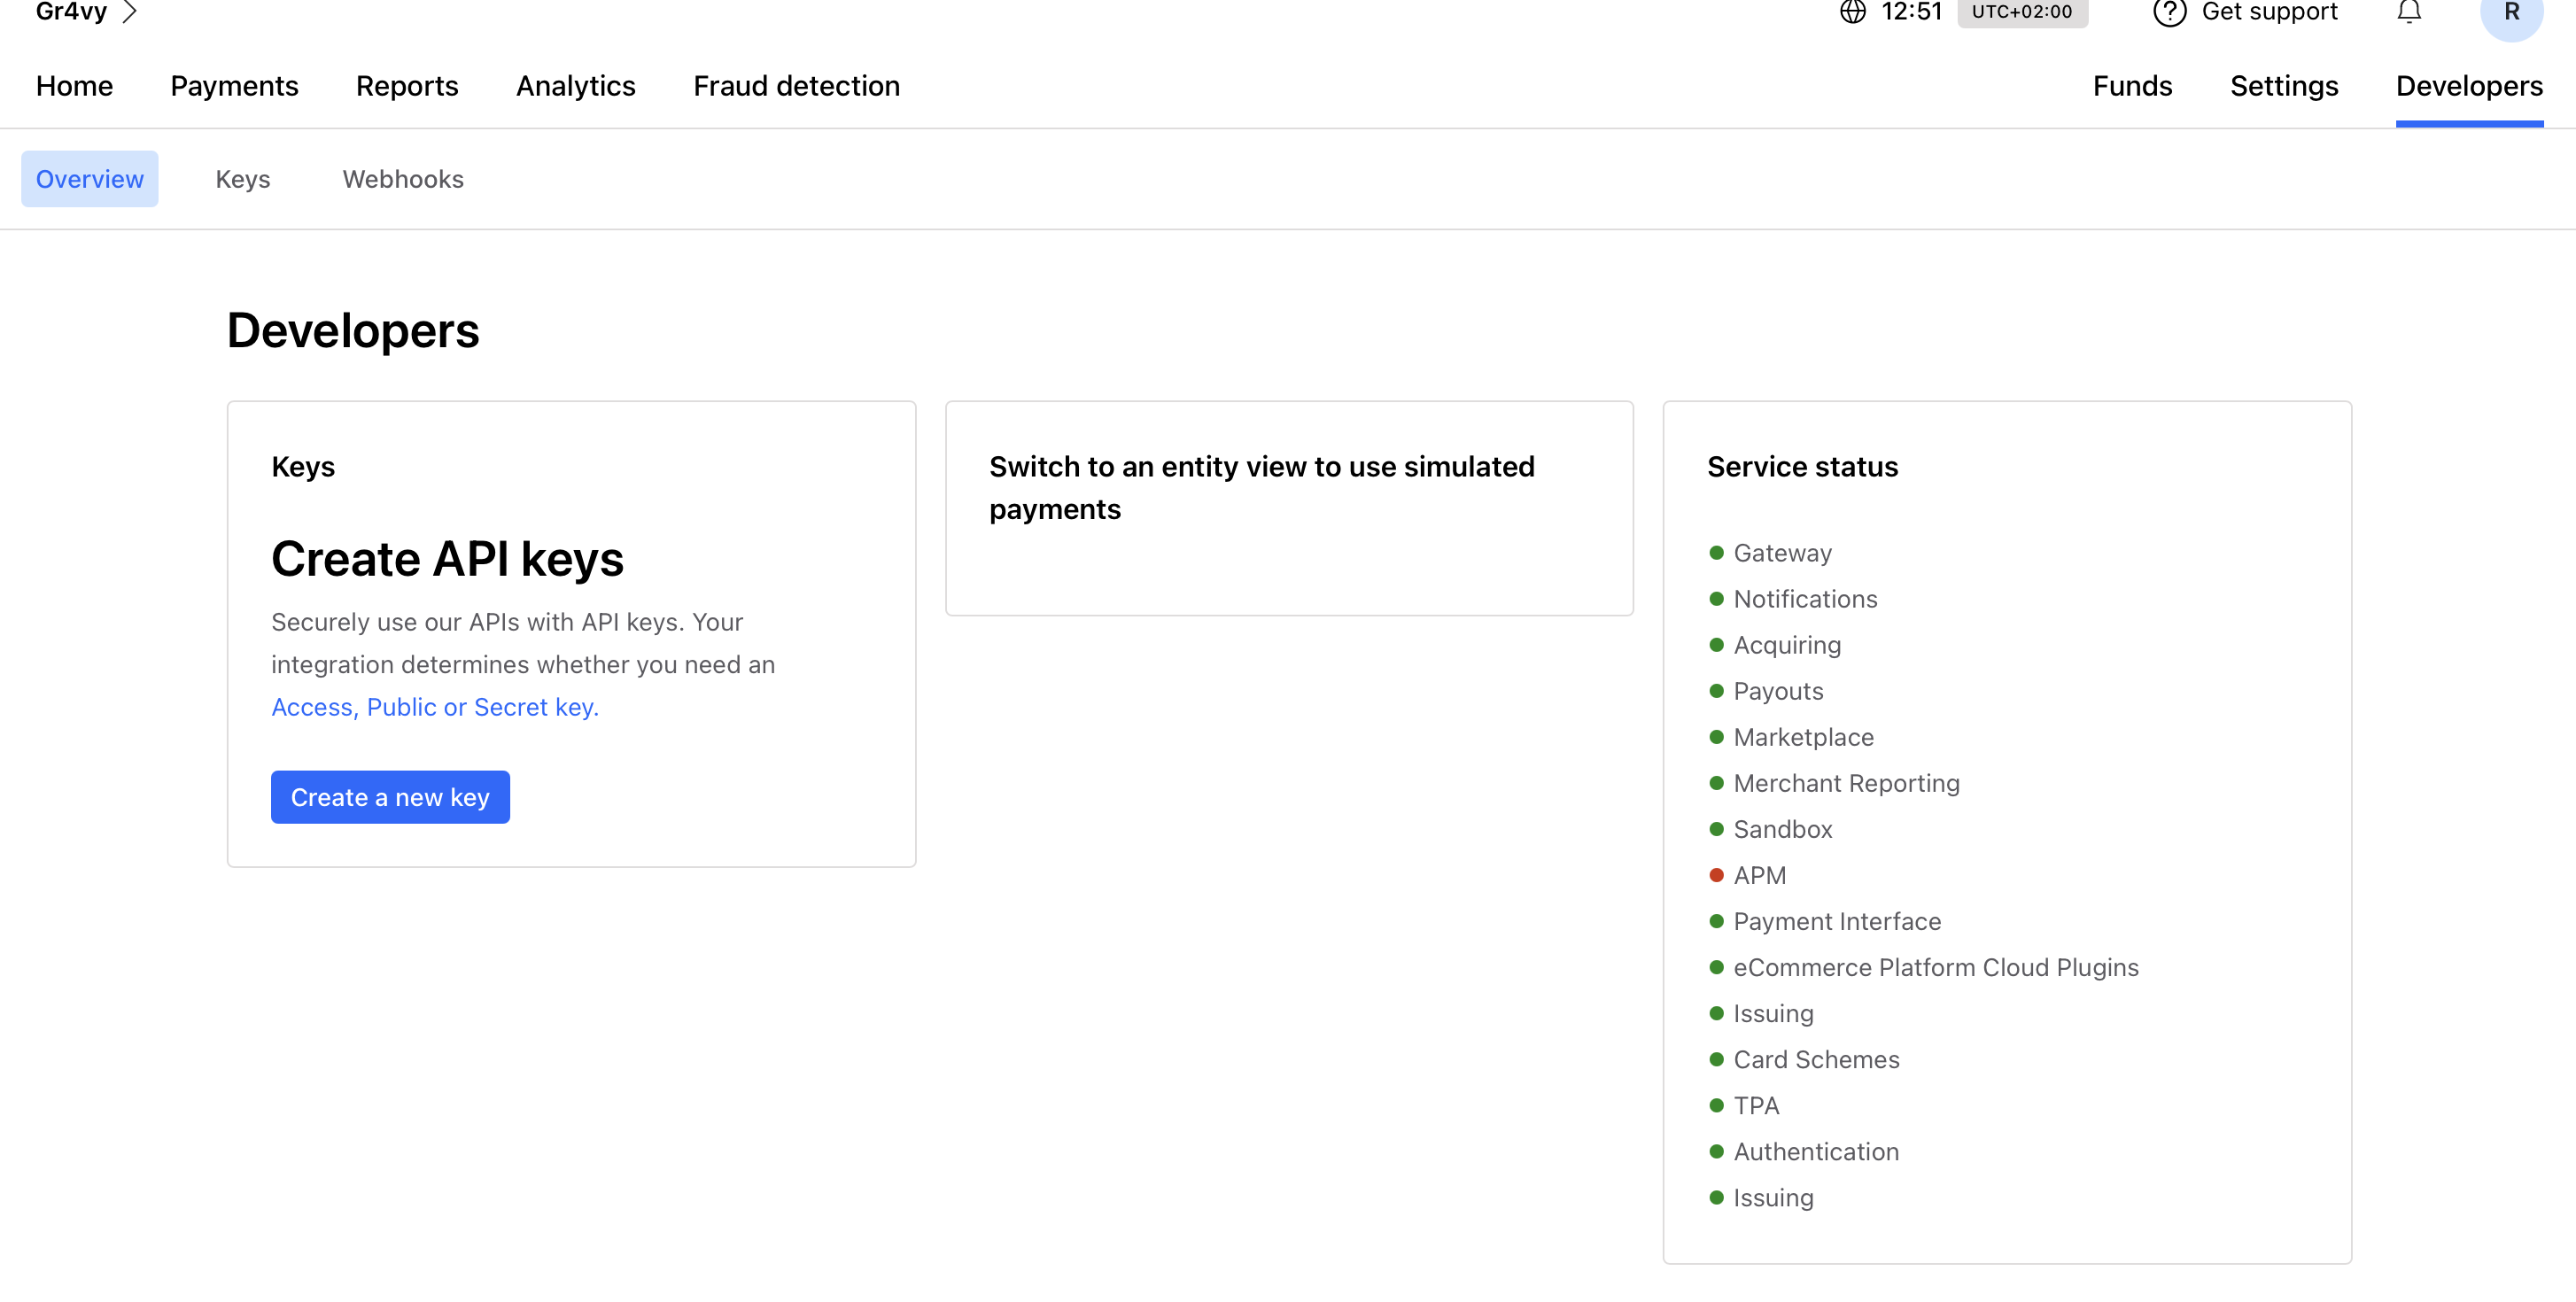
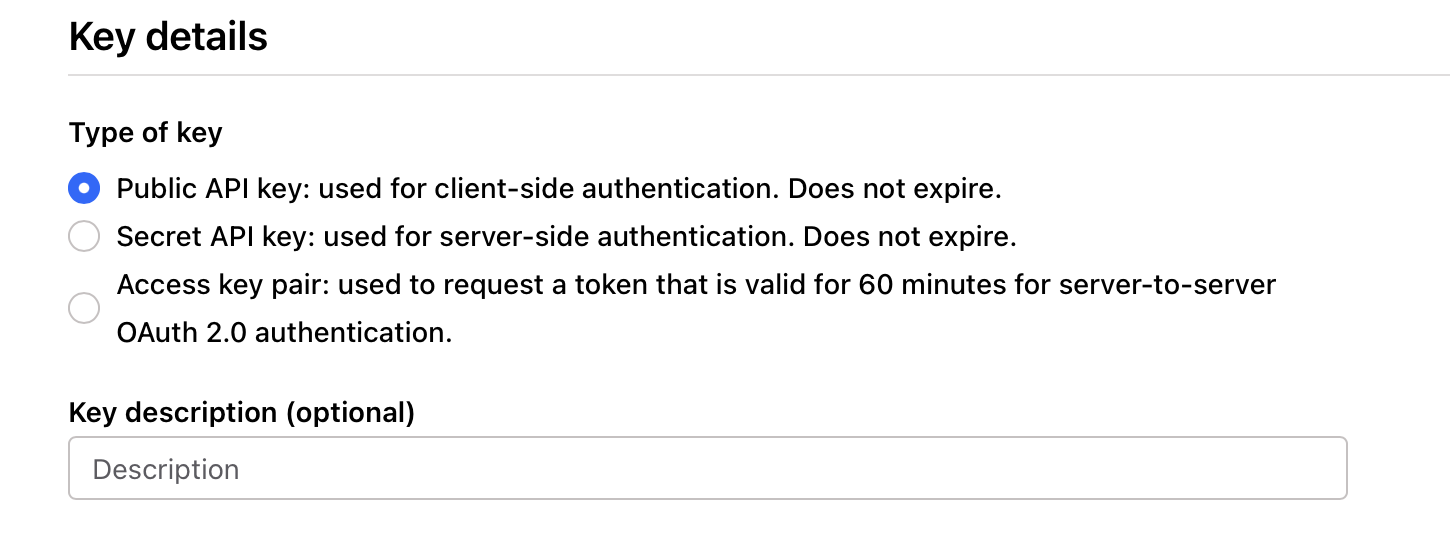
Get the Checkout.com public key from the Checkout.com Developer Dashboard
under the **Developers** -> **Overview** heading. Then click
**+ Create a new key** and select **Public API key**.
 ### Secret key
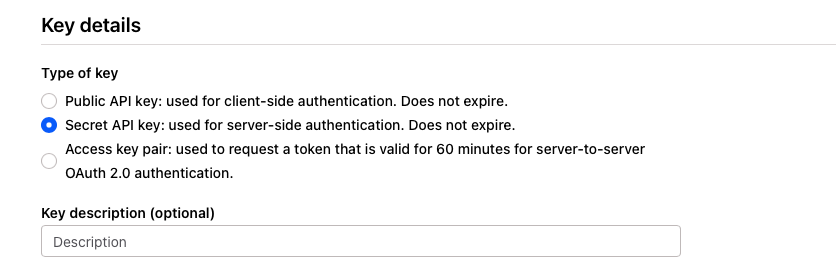
Navigate to the same section and select **+ Create a new key**, then select
**Secret API key**.
### Secret key
Navigate to the same section and select **+ Create a new key**, then select
**Secret API key**.
 ### Webhook secret key
The webhook secret key is used to verify webhook signatures from Checkout.com.
You obtain this value after registering the Gr4vy webhook URL in the Checkout.com
dashboard. See [Webhooks](#webhooks) for setup steps.
### Payout funding account
Use this value to enable payouts and original credit transactions.
## Webhooks
Webhooks are required for this connection. Checkout.com uses webhooks to notify
Gr4vy of payment events such as captures, refunds, and voids.
### Get webhook URL
In the Gr4vy dashboard, navigate to **Connections** ->
**Configured connections**, select your Checkout.com connection, then scroll to the
**Synchronization** section and copy the webhook URL.
### Register webhook
1. In the Checkout.com Dashboard, navigate to **Developers** -> **Webhooks**.
2. Click **New webhook**.
3. Paste the Gr4vy webhook URL in the **URL** field.
4. Under **Event types**, select the following events:
* `payment_approved`
* `payment_captured`
* `payment_capture_declined`
* `payment_declined`
* `payment_refunded`
* `payment_refund_declined`
* `payment_returned`
* `payment_voided`
* `payment_void_declined`
5. Click **Save**.
After saving, copy the signature key shown in the webhook details. Paste this
value into the **Webhook secret key** field in your Gr4vy Checkout.com
connection credentials.
### Webhook secret key
The webhook secret key is used to verify webhook signatures from Checkout.com.
You obtain this value after registering the Gr4vy webhook URL in the Checkout.com
dashboard. See [Webhooks](#webhooks) for setup steps.
### Payout funding account
Use this value to enable payouts and original credit transactions.
## Webhooks
Webhooks are required for this connection. Checkout.com uses webhooks to notify
Gr4vy of payment events such as captures, refunds, and voids.
### Get webhook URL
In the Gr4vy dashboard, navigate to **Connections** ->
**Configured connections**, select your Checkout.com connection, then scroll to the
**Synchronization** section and copy the webhook URL.
### Register webhook
1. In the Checkout.com Dashboard, navigate to **Developers** -> **Webhooks**.
2. Click **New webhook**.
3. Paste the Gr4vy webhook URL in the **URL** field.
4. Under **Event types**, select the following events:
* `payment_approved`
* `payment_captured`
* `payment_capture_declined`
* `payment_declined`
* `payment_refunded`
* `payment_refund_declined`
* `payment_returned`
* `payment_voided`
* `payment_void_declined`
5. Click **Save**.
After saving, copy the signature key shown in the webhook details. Paste this
value into the **Webhook secret key** field in your Gr4vy Checkout.com
connection credentials.